How to Add Subscription Payments in Strapi Using Paddle

Written by
Keshav Saini
Front End Developer

Pankaj Siwach
Front End Developer

Table of contents
Build with Radial Code
Share this
Honestly, if you've ever tried to build subscription billing from scratch, you know how quickly it turns into a rabbit hole. Between handling prorations, managing cancellations, and staying on top of tax compliance across different regions — it's a lot. That's exactly why I reached for Paddle when working on a recent Strapi project. It takes the heavy lifting off your plate so you can focus on actually building your product.
In this guide, I'll walk you through how I wired Paddle into a Strapi backend. It's a clean, no-nonsense setup that you can get into production without too much fuss.
Want to Explore more? Radial code
How the Integration Works
Before touching any code, it's worth taking a minute to understand what's actually happening under the hood. The whole thing hinges on server-to-server communication — meaning you're not trusting the browser to tell you a payment went through. You're waiting for Paddle to confirm it directly.
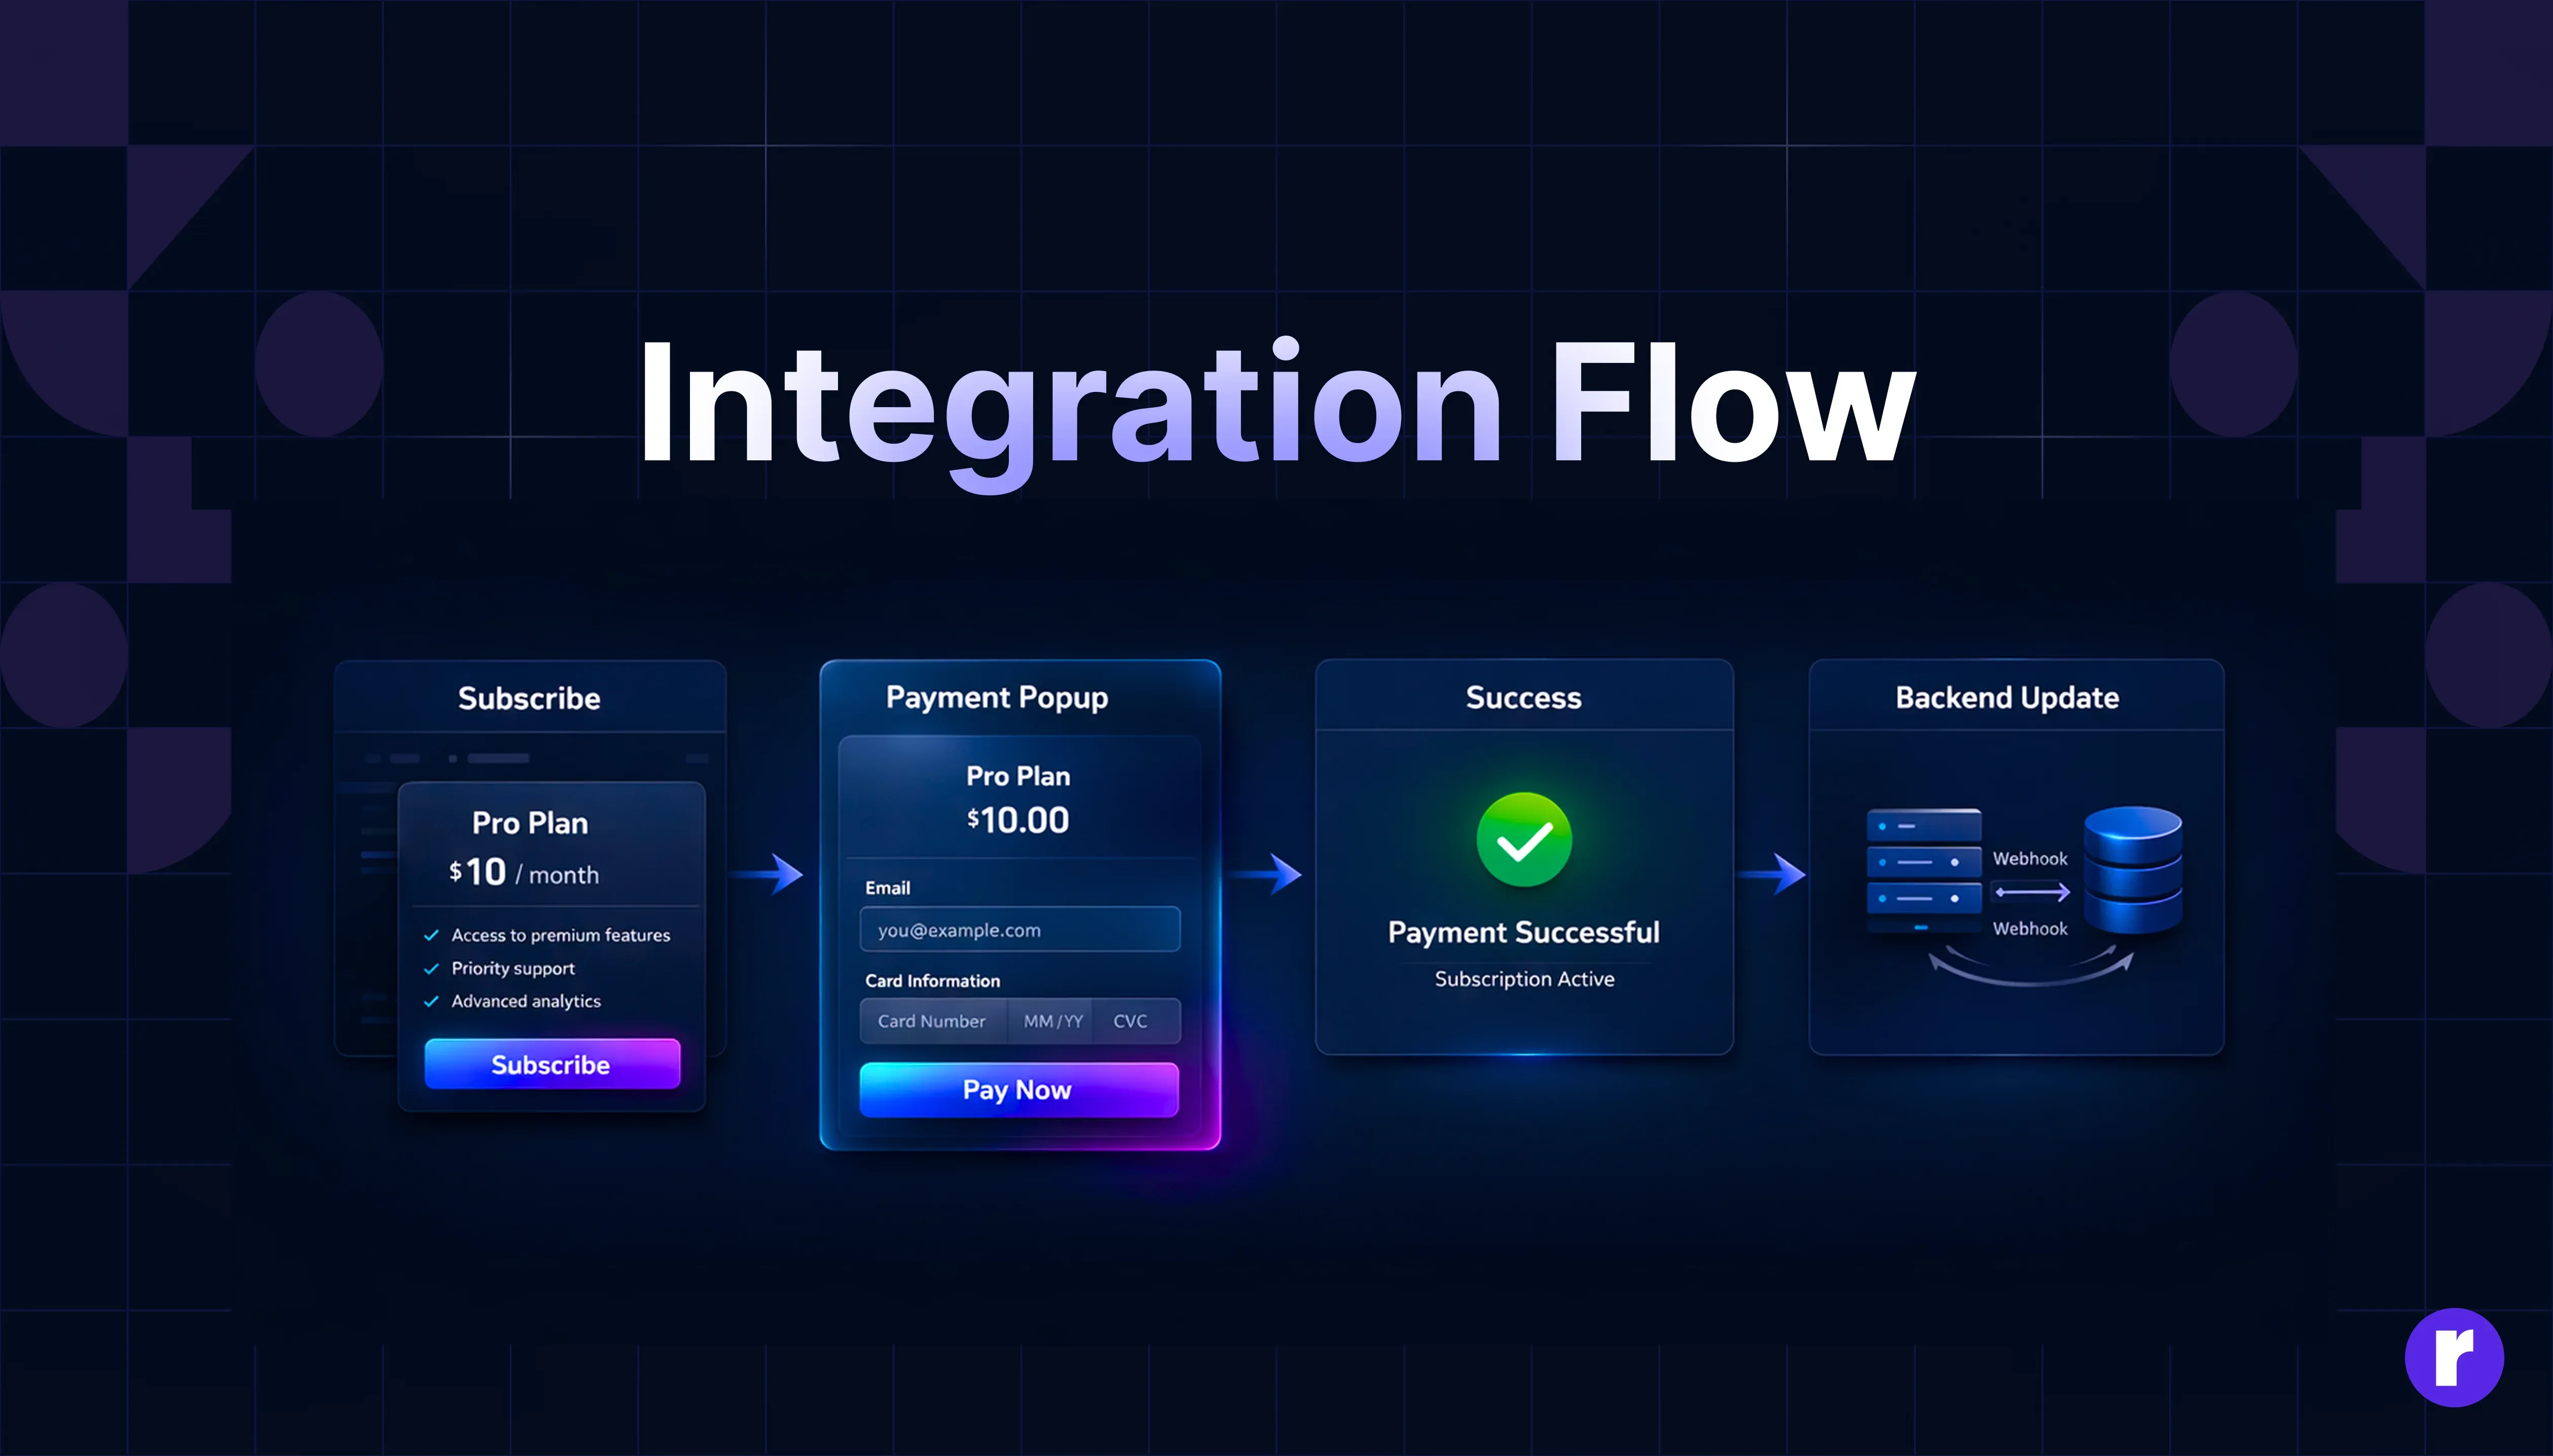
Here's the flow from start to finish:
- User clicks "Subscribe" on your frontend.
- Frontend hits your Strapi API to get the checkout data.
- Paddle checkout opens for the user.
- User completes the payment.
- Paddle fires a secure webhook straight to your Strapi backend.
- Strapi updates the user's subscription status in the database.
"Important: Don't ever update a user's subscription status based on a frontend success callback. I've seen this go wrong. Always treat Paddle's webhooks as your single source of truth — full stop."
Want to learn more about Strapi ? Click Here
Step 1: Set Up Your Strapi Collections
First things first — you need somewhere to store your product and subscription data. Head into your Strapi admin panel and create these two collections:
- Product Collection
- name (Text)
- paddle_product_id(Text/Number — this maps directly to your product in Paddle)
- Subscription Collection
- user_email(Email)
- paddle_subscription_id(Text)
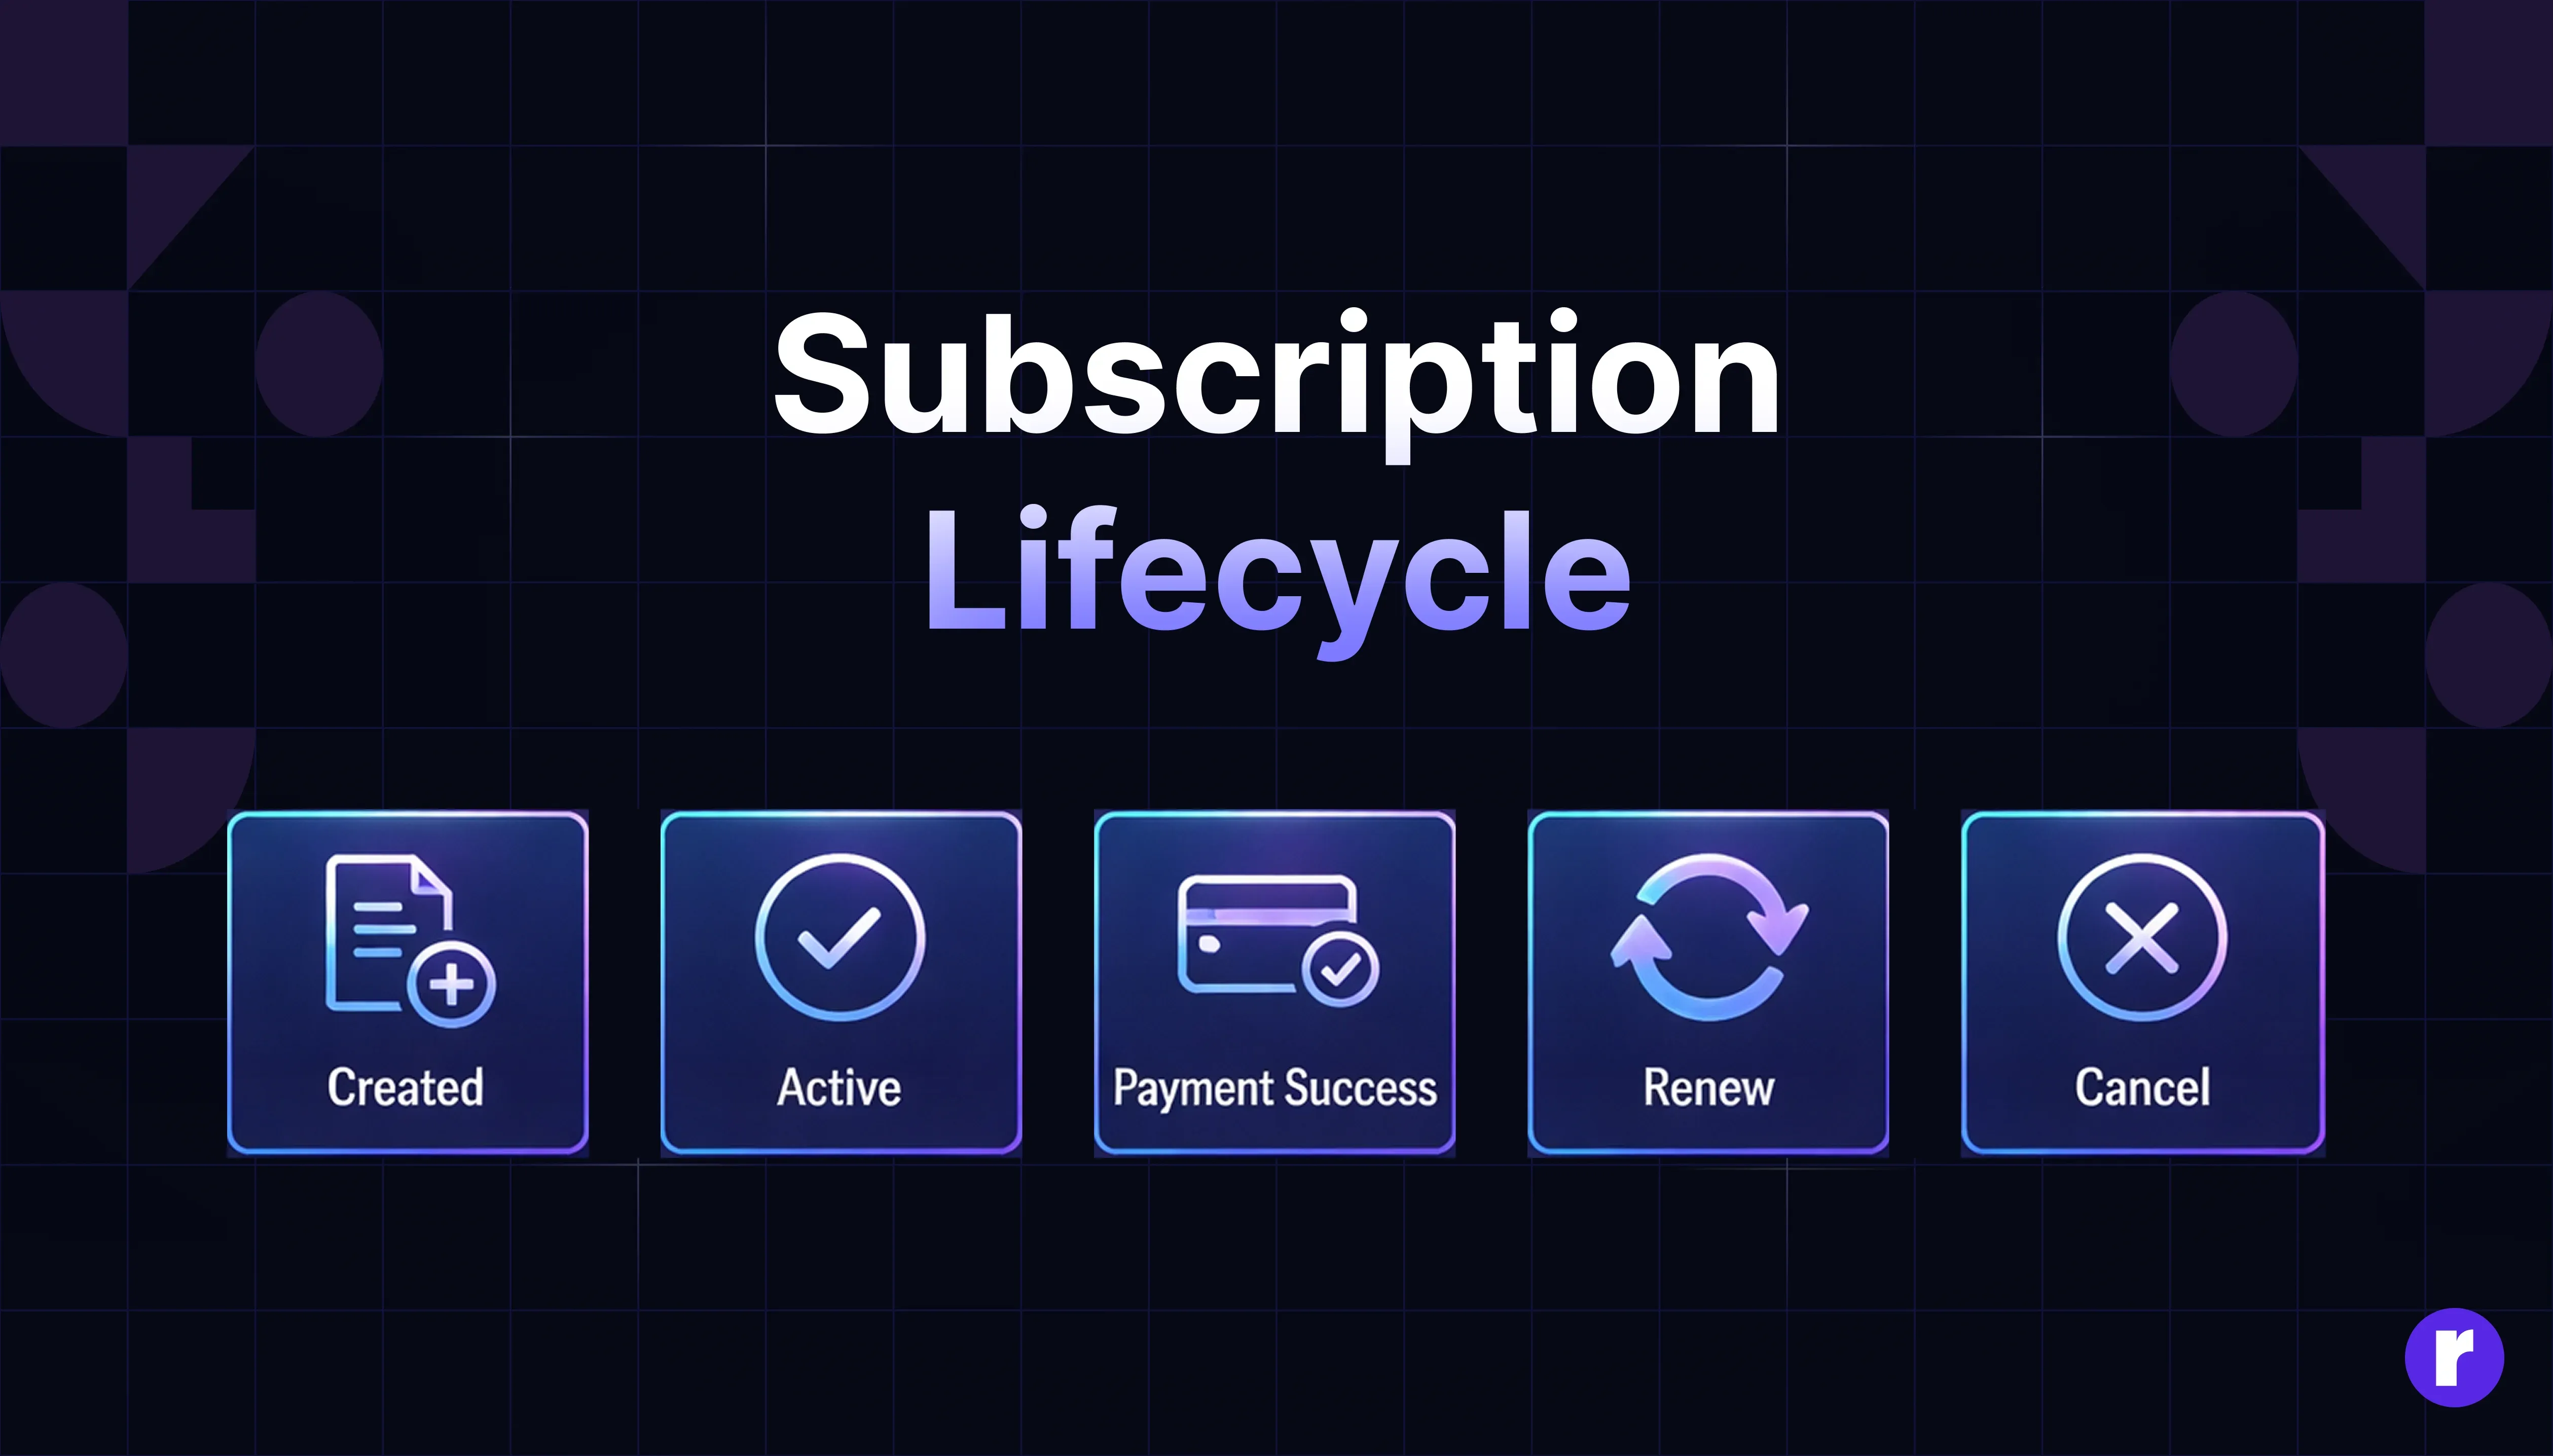
- status (Text — you'll be working with values like ) 'active''past_due''canceled'
Nothing fancy here, just the essentials to get things moving.
Step 2: Create the Checkout API in Strapi
Now you need an endpoint your frontend can call to grab the right Paddle Product ID for whatever the user is trying to buy.
Create a new controller in your Strapi project:
/src/api/payment/controllers/payment.js
module.exports = {
  async createCheckout(ctx) {
    const { productId, email } = ctx.request.body;

    // Find the product in the Strapi database
    const product = await strapi.entityService.findOne(
      "api::product.product",
      productId
    );

    if (!product) {
      return ctx.throw(404, "Product not found");
    }

    // Return the required data to initialize Paddle on the frontend
    return {
      paddleProductId: product.paddle_product_id,
      email,
    };
  },
};
Simple enough — it looks up the product and hands back what the frontend needs to kick off the Paddle checkout
Step 3: Trigger Paddle Checkout on the Frontend
On the frontend side — whether you're using React, Vue, or plain JS — you call the endpoint above, and once you get the data back, you open the Paddle checkout modal.
const handleSubscribe = async () => {
  // 1. Fetch the checkout data from Strapi
  const res = await fetch("/api/create-checkout", {
    method: "POST",
    headers: {
      "Content-Type": "application/json",
    },
    body: JSON.stringify({
      productId: 1, // The Strapi ID of the product
      email: user.email,
    }),
  });

  const data = await res.json();

  // 2. Open the Paddle checkout overlay
  window.Paddle.Checkout.open({
    product: data.paddleProductId,
    email: data.email,
  });
};
At this point, Paddle takes over and handles the actual payment UI. You don't need to build any of that yourself, which is a nice win.
Step 4: Handle Webhooks (The Core Logic)
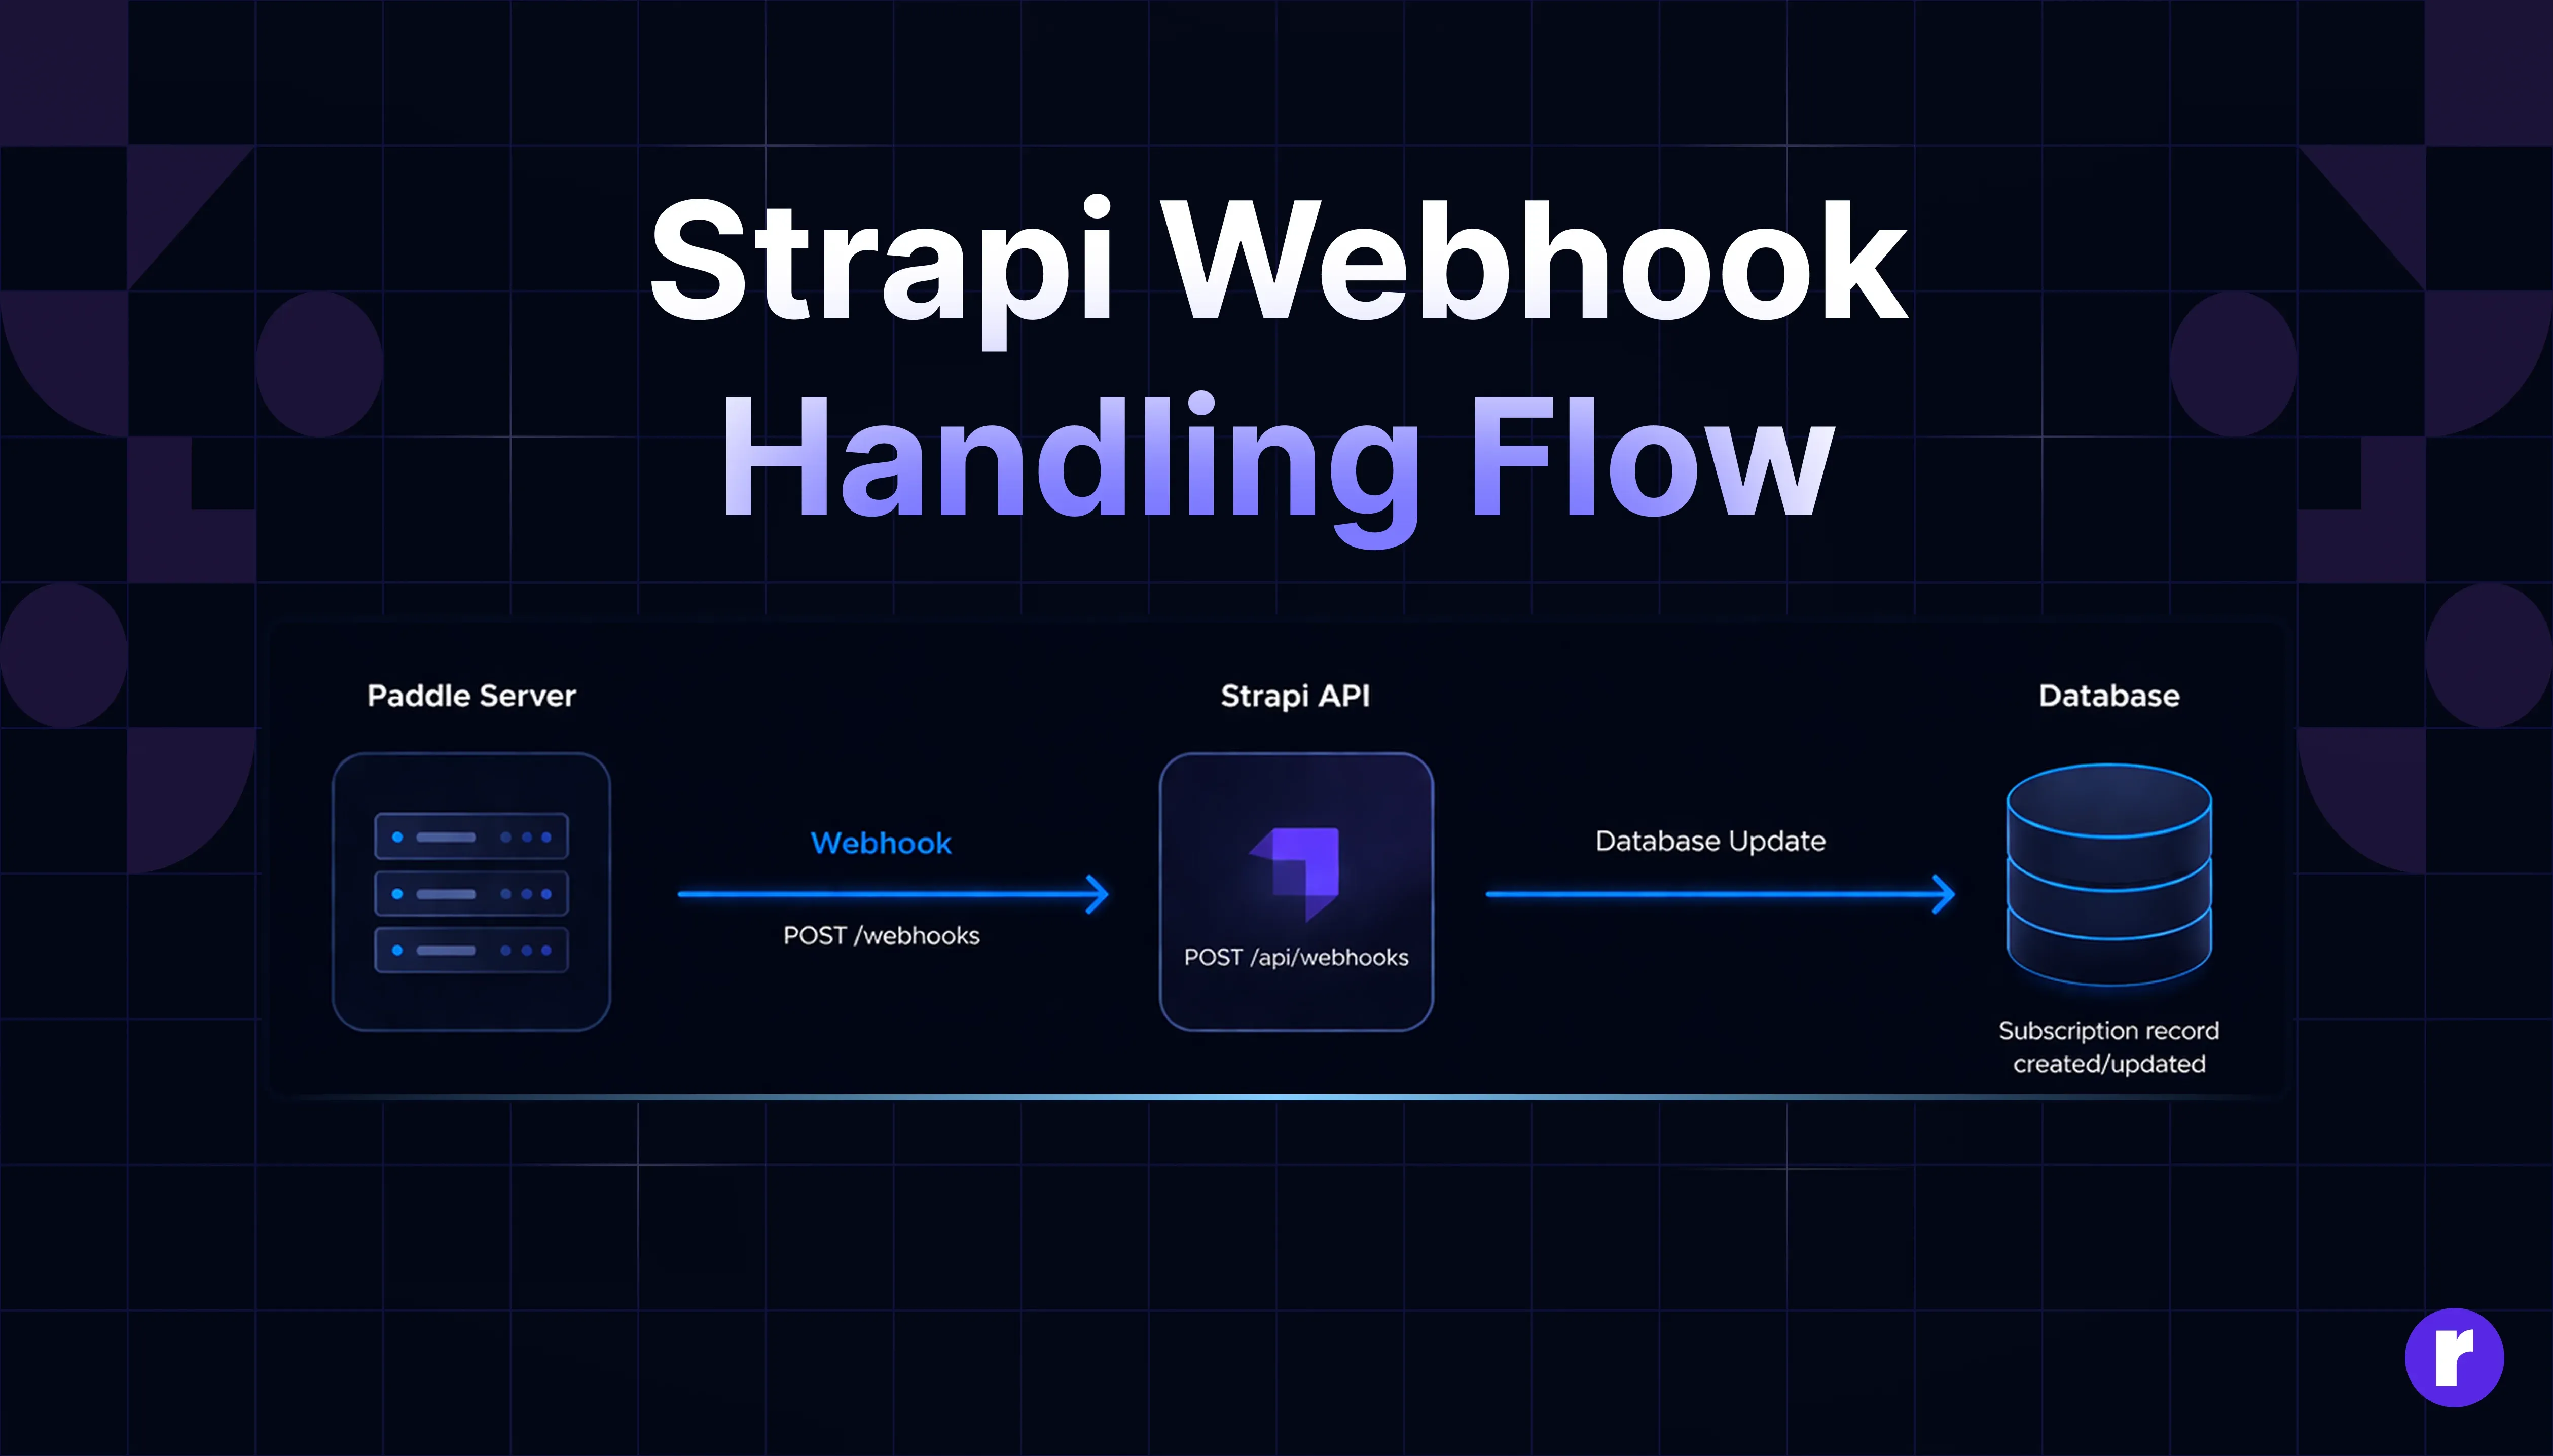
This is where the real work happens. Once a payment goes through, Paddle sends a POST request to your server. Your job is to listen for those events and update your database accordingly.
/src/api/webhook/controllers/webhook.js
module.exports = {
  async handleWebhook(ctx) {
    const event = ctx.request.body;
    // Handle new subscription creation
    if (event.alert_name === "subscription_created") {
      await strapi.entityService.create("api::subscription.subscription", {
        data: {
          paddle_subscription_id: event.subscription_id,
          user_email: event.email,
          status: event.status,
        },
      });
    }

    // Handle successful recurring payments
    if (event.alert_name === "subscription_payment_succeeded") {
      await strapi.entityService.updateMany(
        "api::subscription.subscription",
        {
          filters: {
            paddle_subscription_id: event.subscription_id,
          },
          data: { status: "active" },
        }
      );
    }

    // Always return a 200 OK so Paddle knows the webhook was received
    ctx.send({ ok: true });
  },
};
One thing worth noting — always return a 200 OK even if you don't act on a particular event. If Paddle doesn't get that response, it'll keep retrying, and that can cause duplicate records if you're not careful.
Key Security & Best Practices
A few things I'd strongly recommend before you ship this to production:
- Verify Webhook Signatures:This isn't in the example above, but please don't skip it in production. Paddle signs every webhook, and you should be validating that signature to make sure the request is actually coming from Paddle and not someone trying to spoof it.
- Store Subscription IDs:Always hang onto the paddle_subscription_id. You'll thank yourself later when you need to handle a cancellation or process a refund.
- Use the Sandbox First: Paddle has a solid Sandbox environment. Run your entire payment flow through it before going anywhere near live transactions.
- Guard Your Keys: Your Paddle API keys and vendor IDs belong in .env files — not hardcoded, not committed to Git. Ever.
Conclusion
And that's pretty much it. You've got a working subscription system that's clean, scalable, and ready for production. Paddle handles the billing complexity and tax headaches, Strapi keeps your data in order, and webhooks make sure everything stays in sync. It's one of those setups that just works — and doesn't require you to reinvent the wheel to get there.


