Wordpress Localization: The Right Way to Create a Multilingual Website

Written by
Diksha Arora
Wordpress Developer

Pardeep Verma
CMS developer

Table of contents
Build with Radial Code
Share this
In today's globalized world, having a multilingual website is essential for businesses looking to reach a broader audience. WordPress, being one of the most popular content management systems, offers various methods for localization and translation. In this guide, we’ll walk you through the right way to create a multilingual WordPress website using the Polylang plugin.
Step 1: Install and Activate Polylang
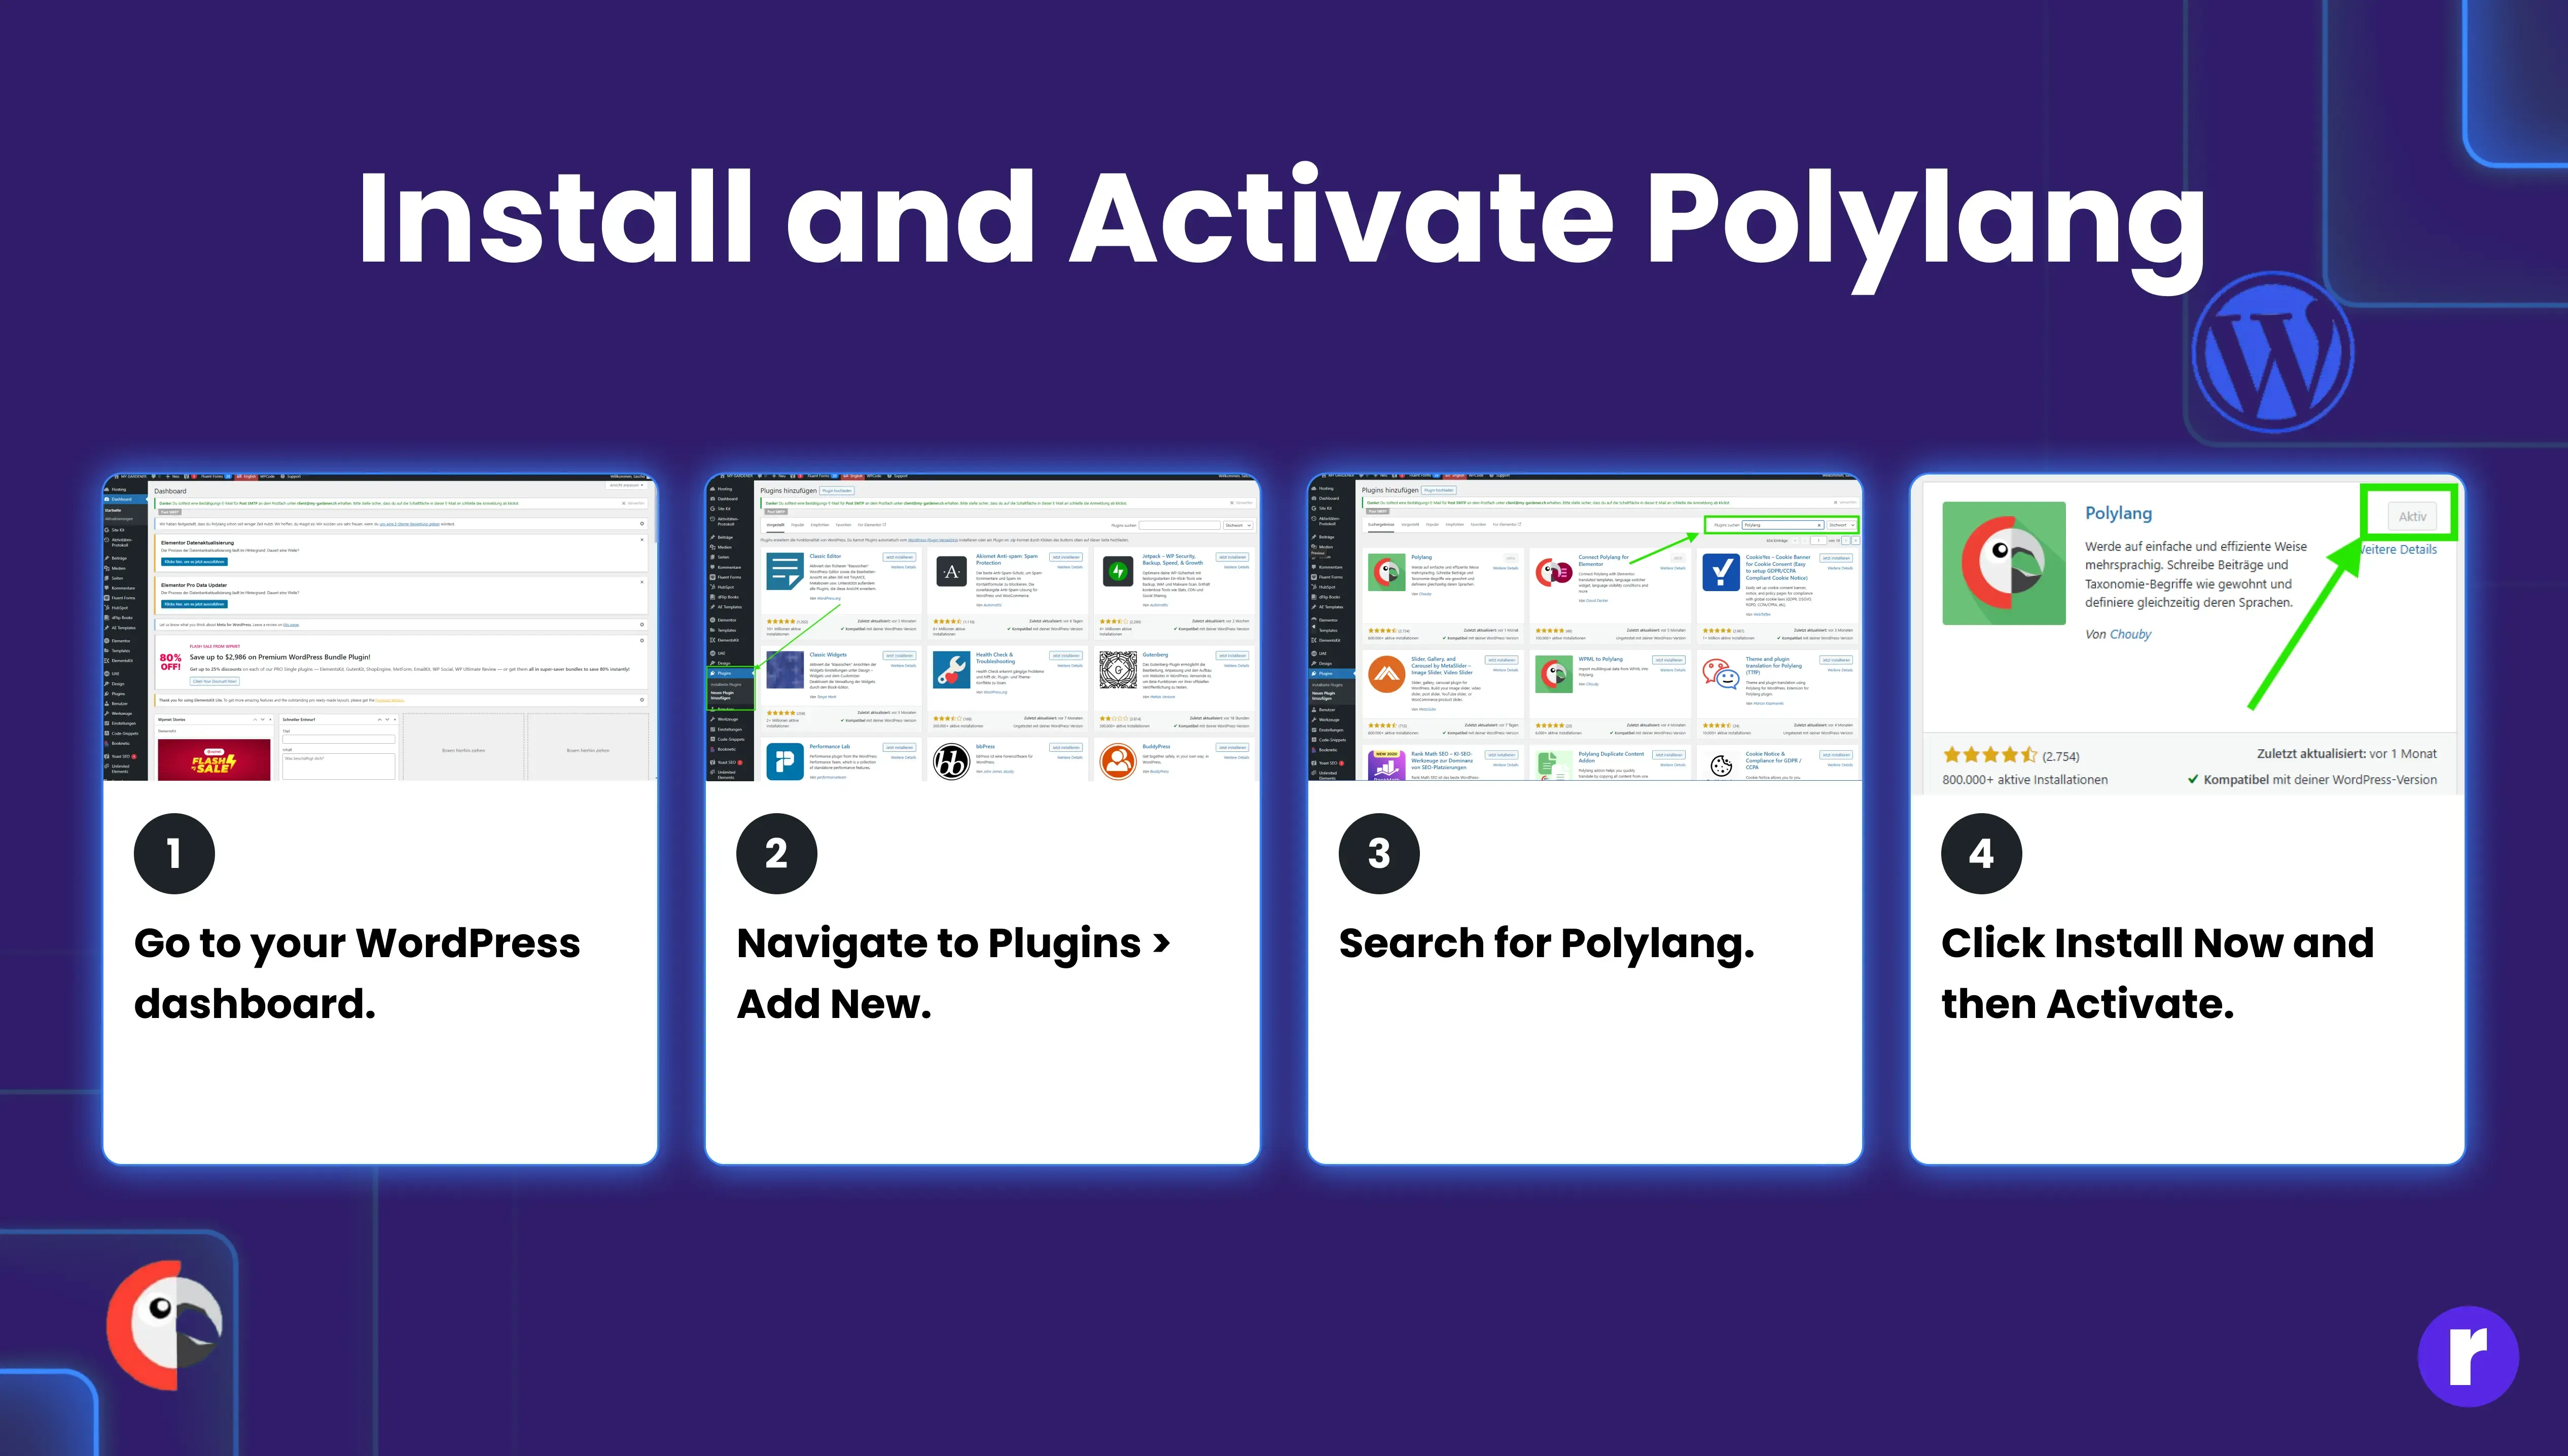
- Go to your WordPress dashboard.
- Navigate to Plugins > Add New.
- Search for Polylang.
- Click Install Now and then Activate.
Step 2: Configure Languages
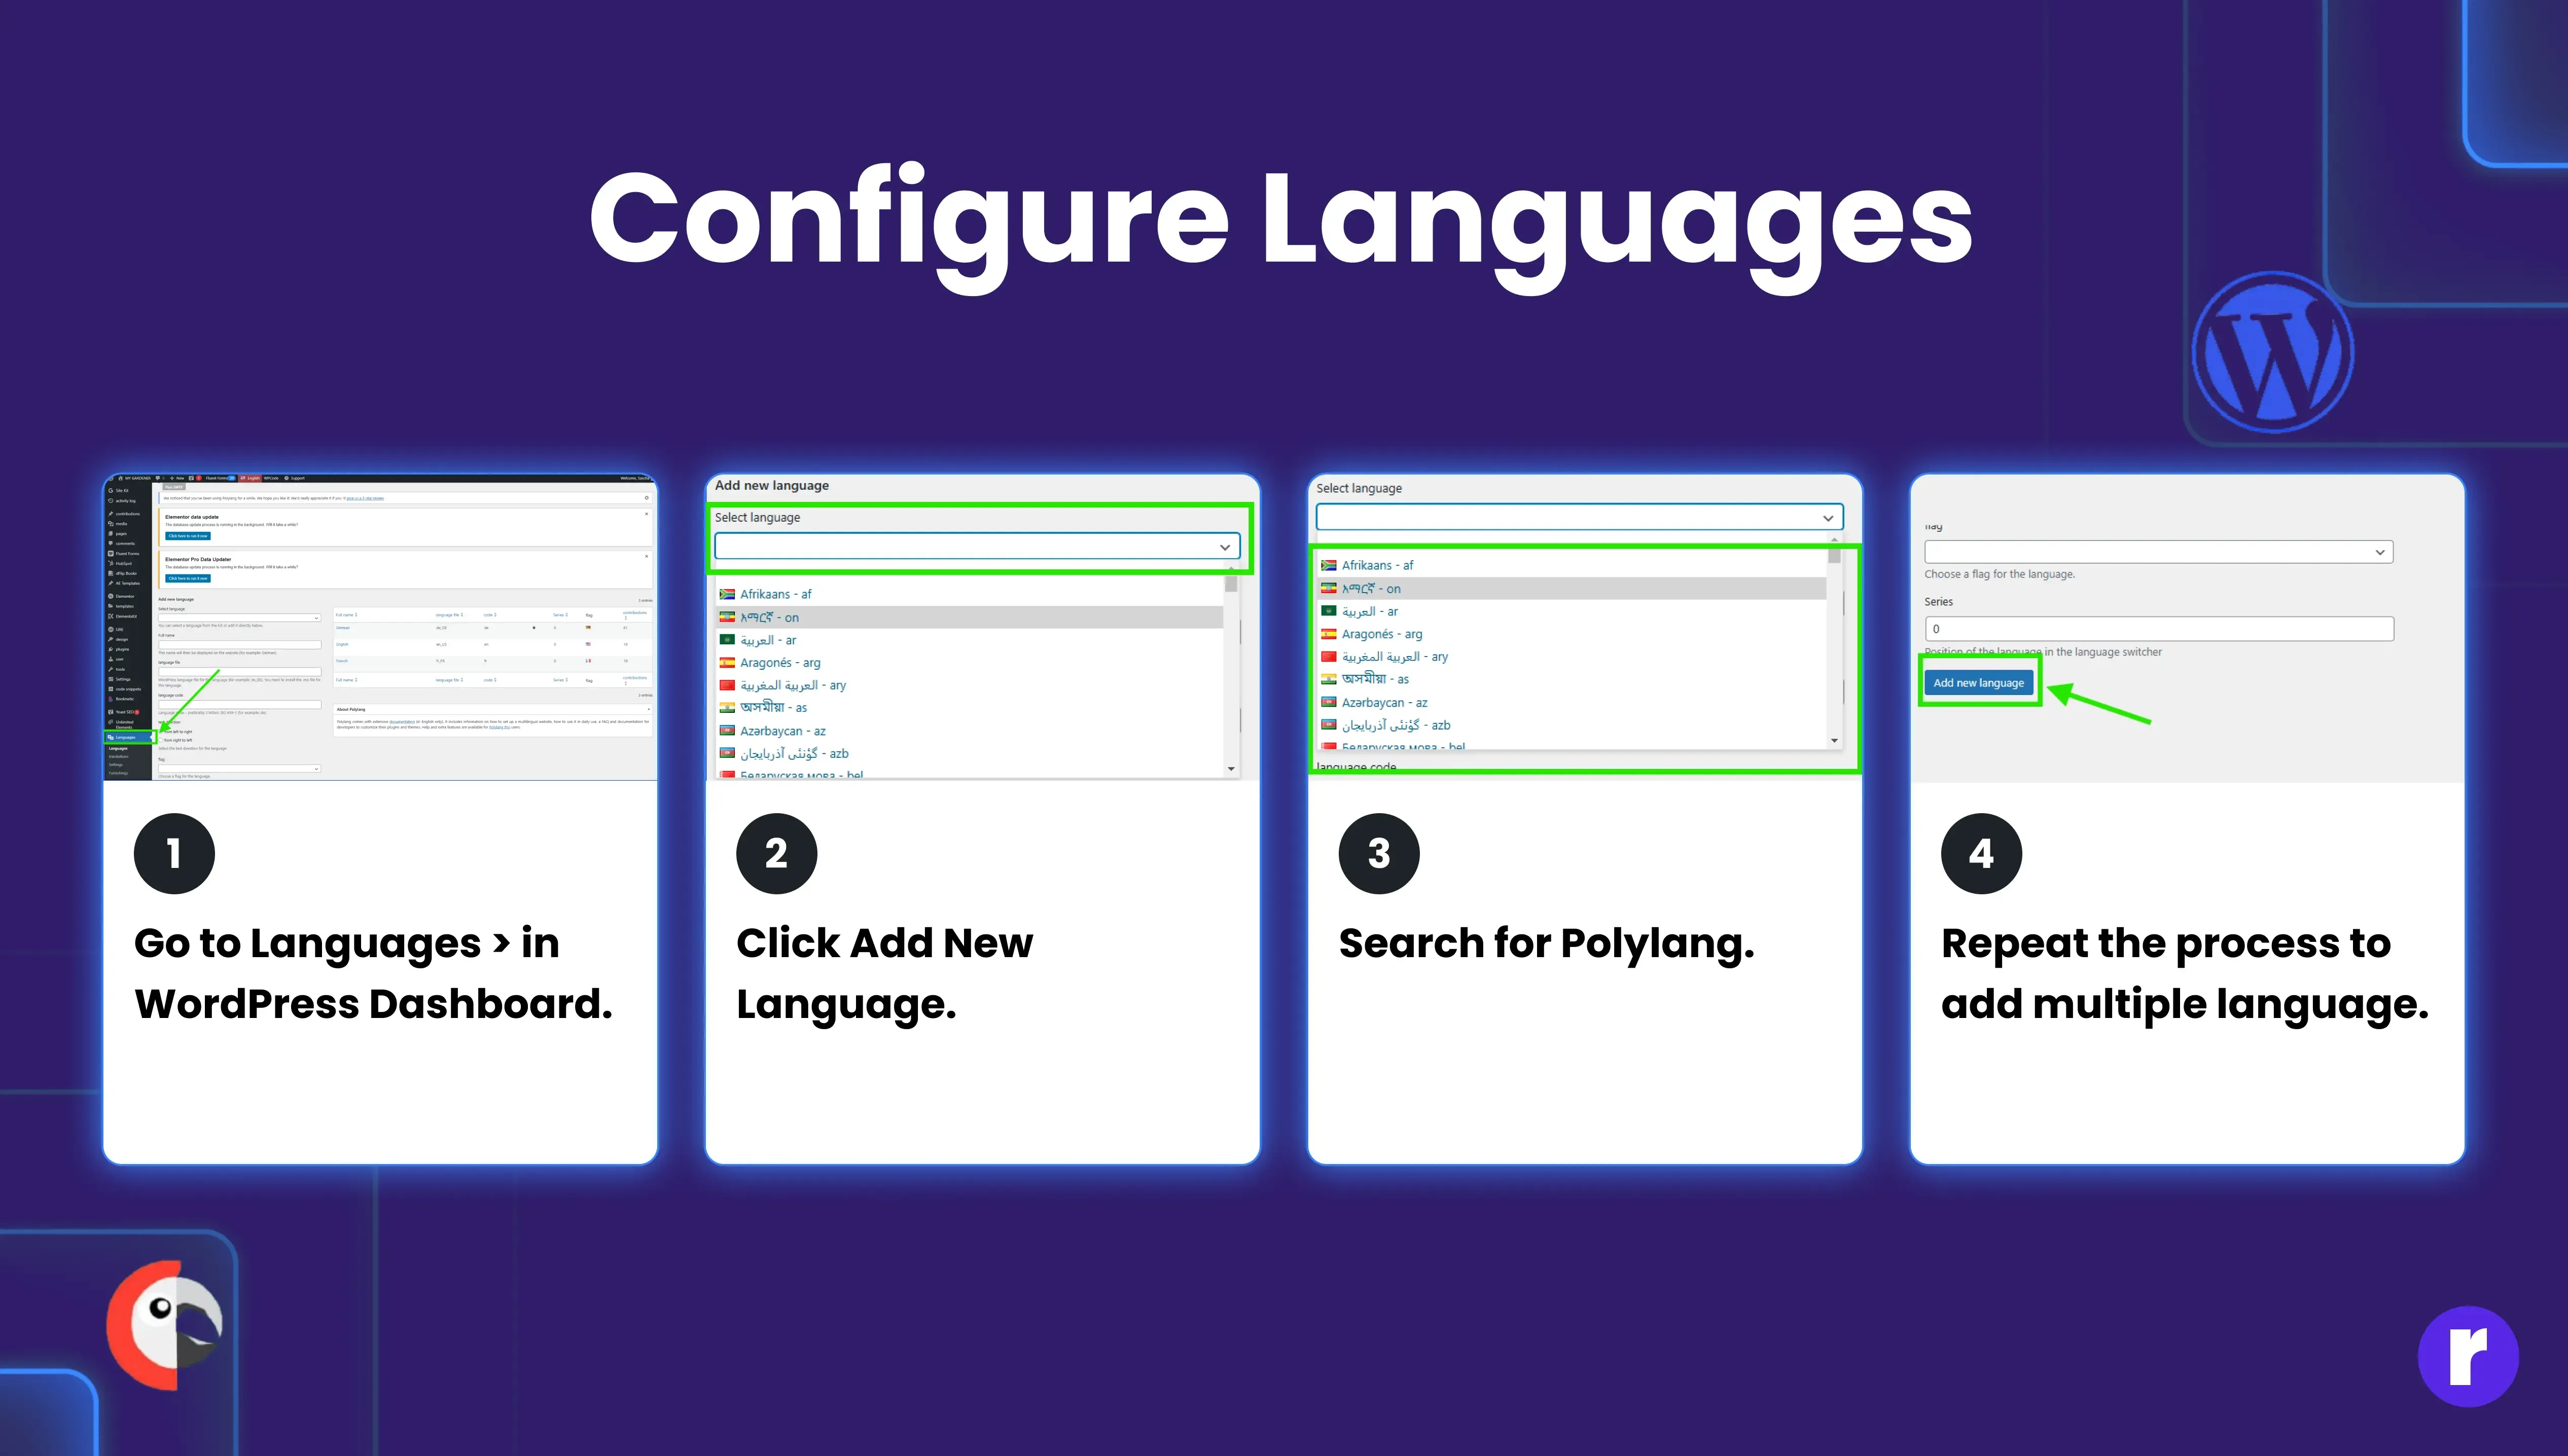
- Go to Languages > Languages in the WordPress dashboard.
- Click Add New Language.
- Select the desired language from the dropdown menu.
- Repeat the process to add multiple languages.
Step 3: Translate Your Content
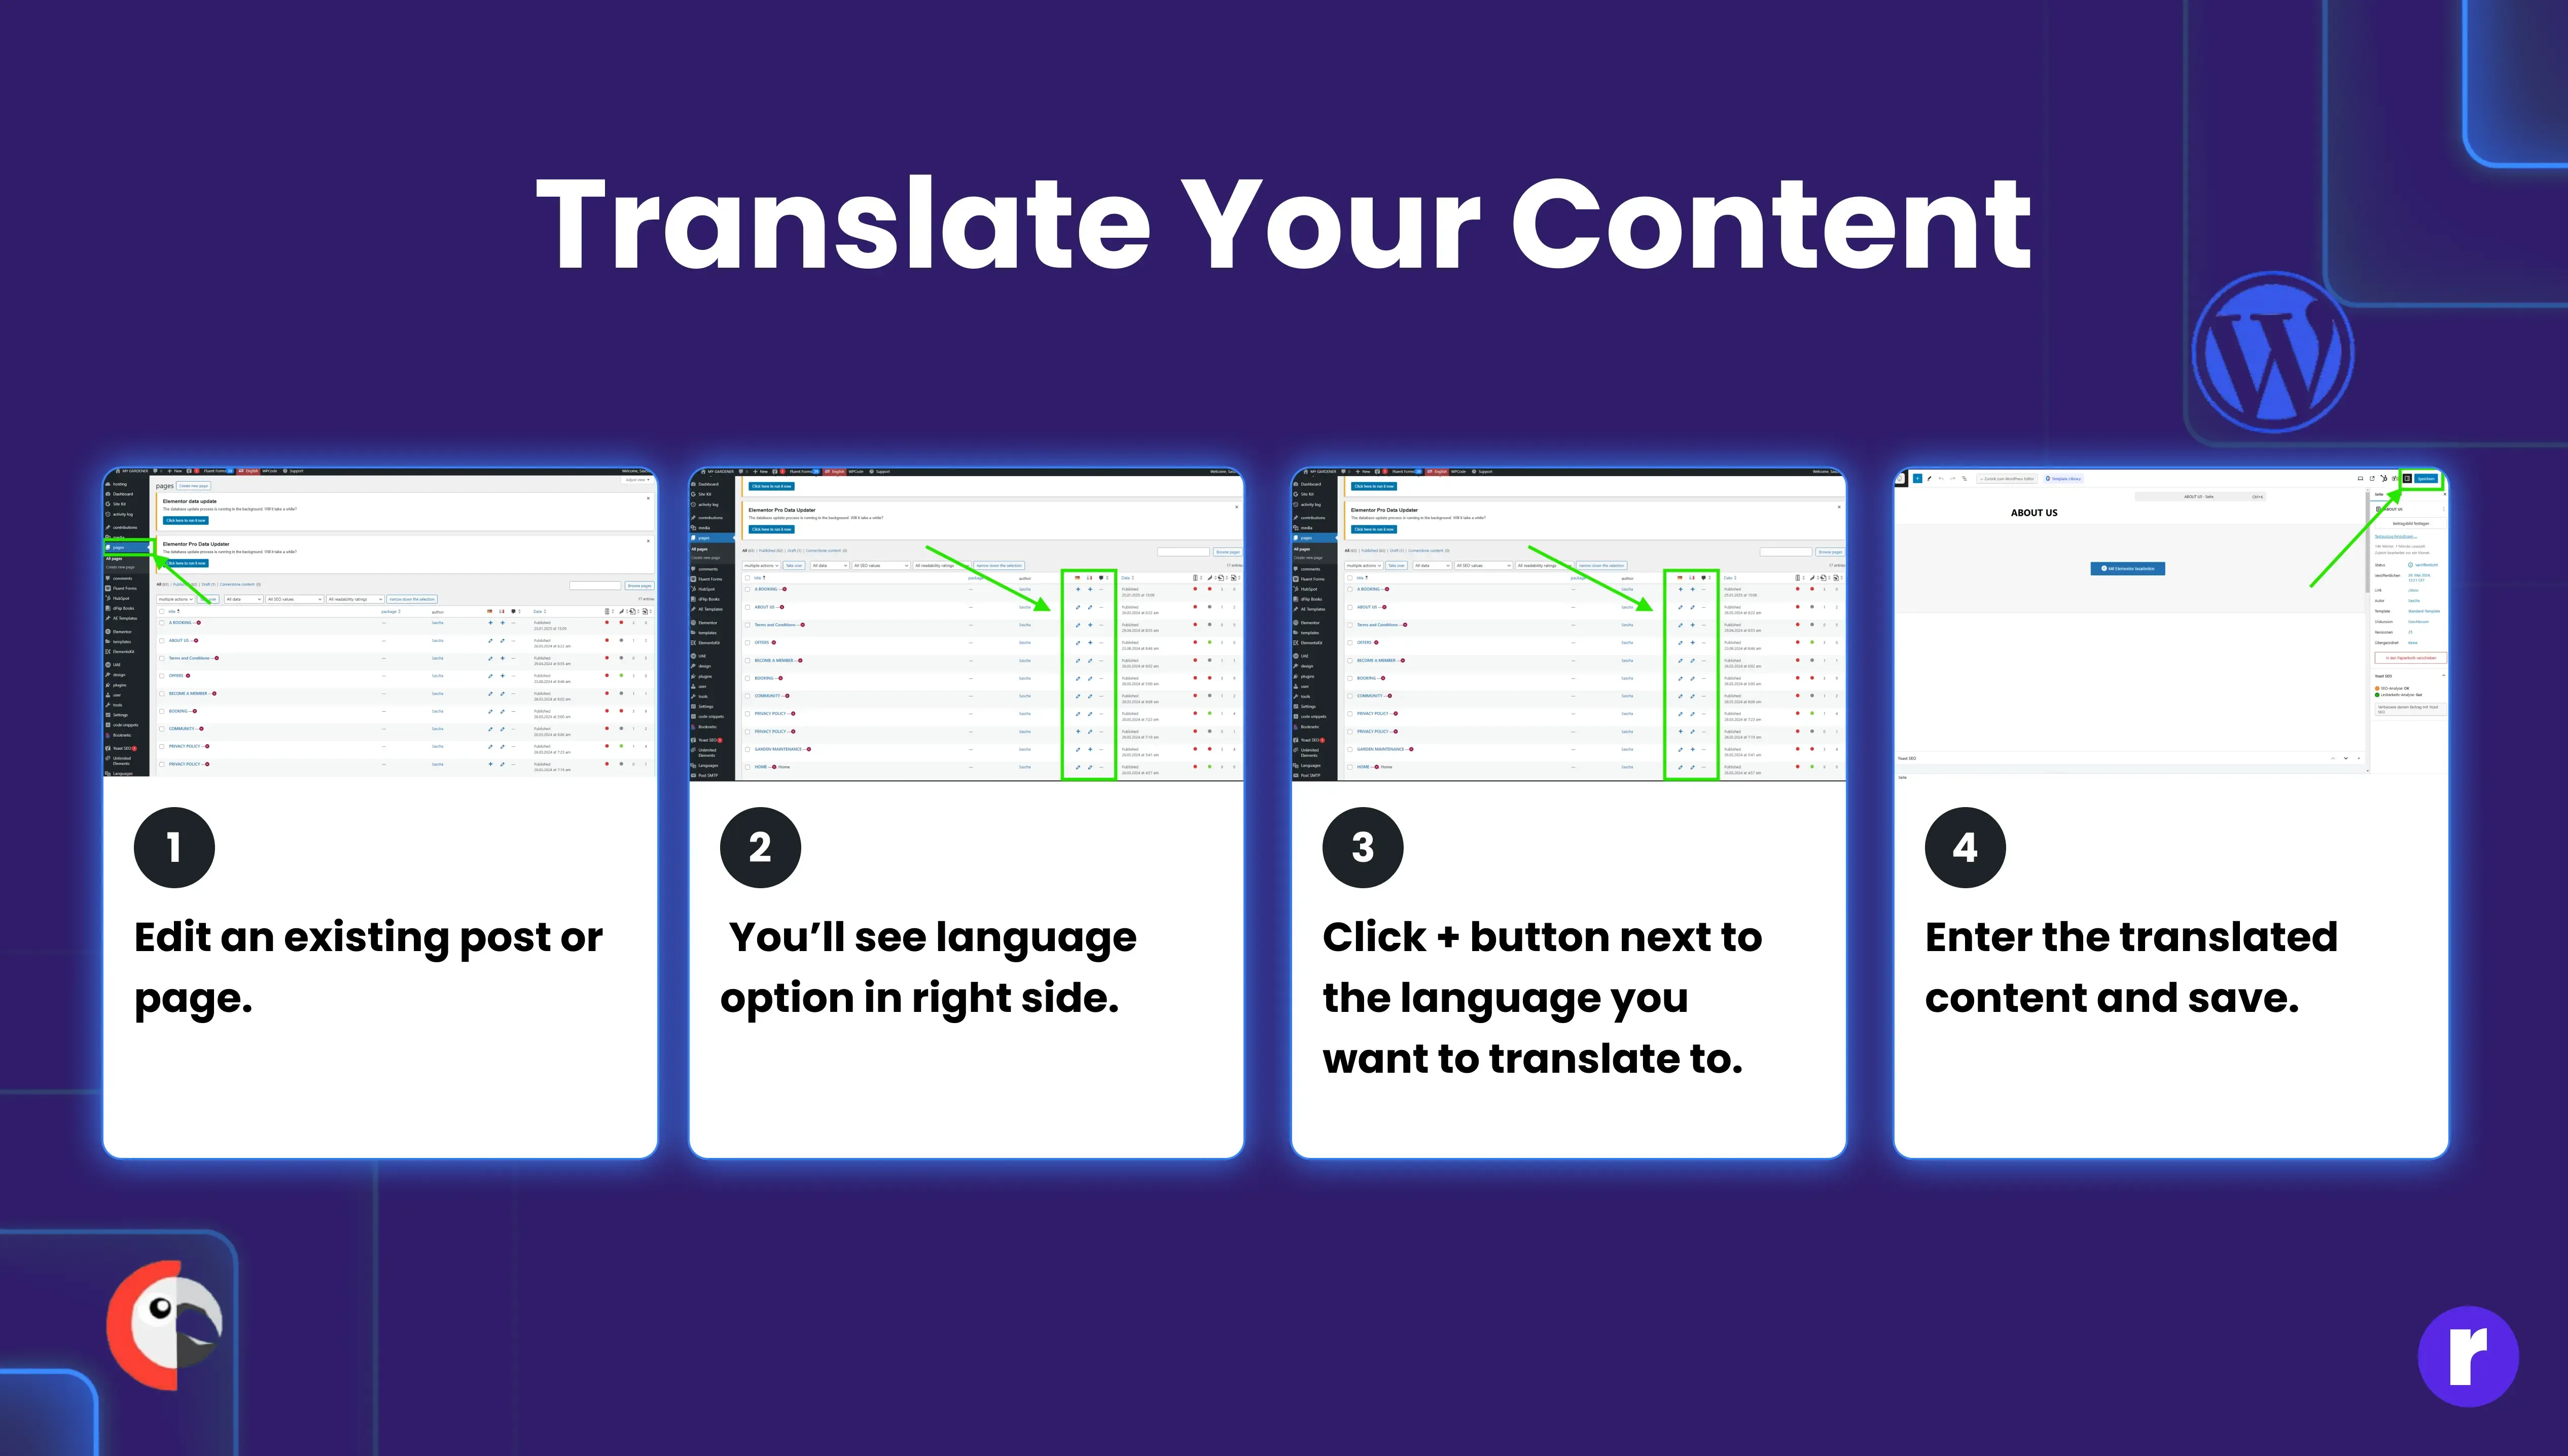
- Edit an existing post or page.
- On the right-hand side, you’ll see language options.
- Click the + button next to the language you want to translate to.
- Enter the translated content and save.
Step 4: Add a Language Switcher
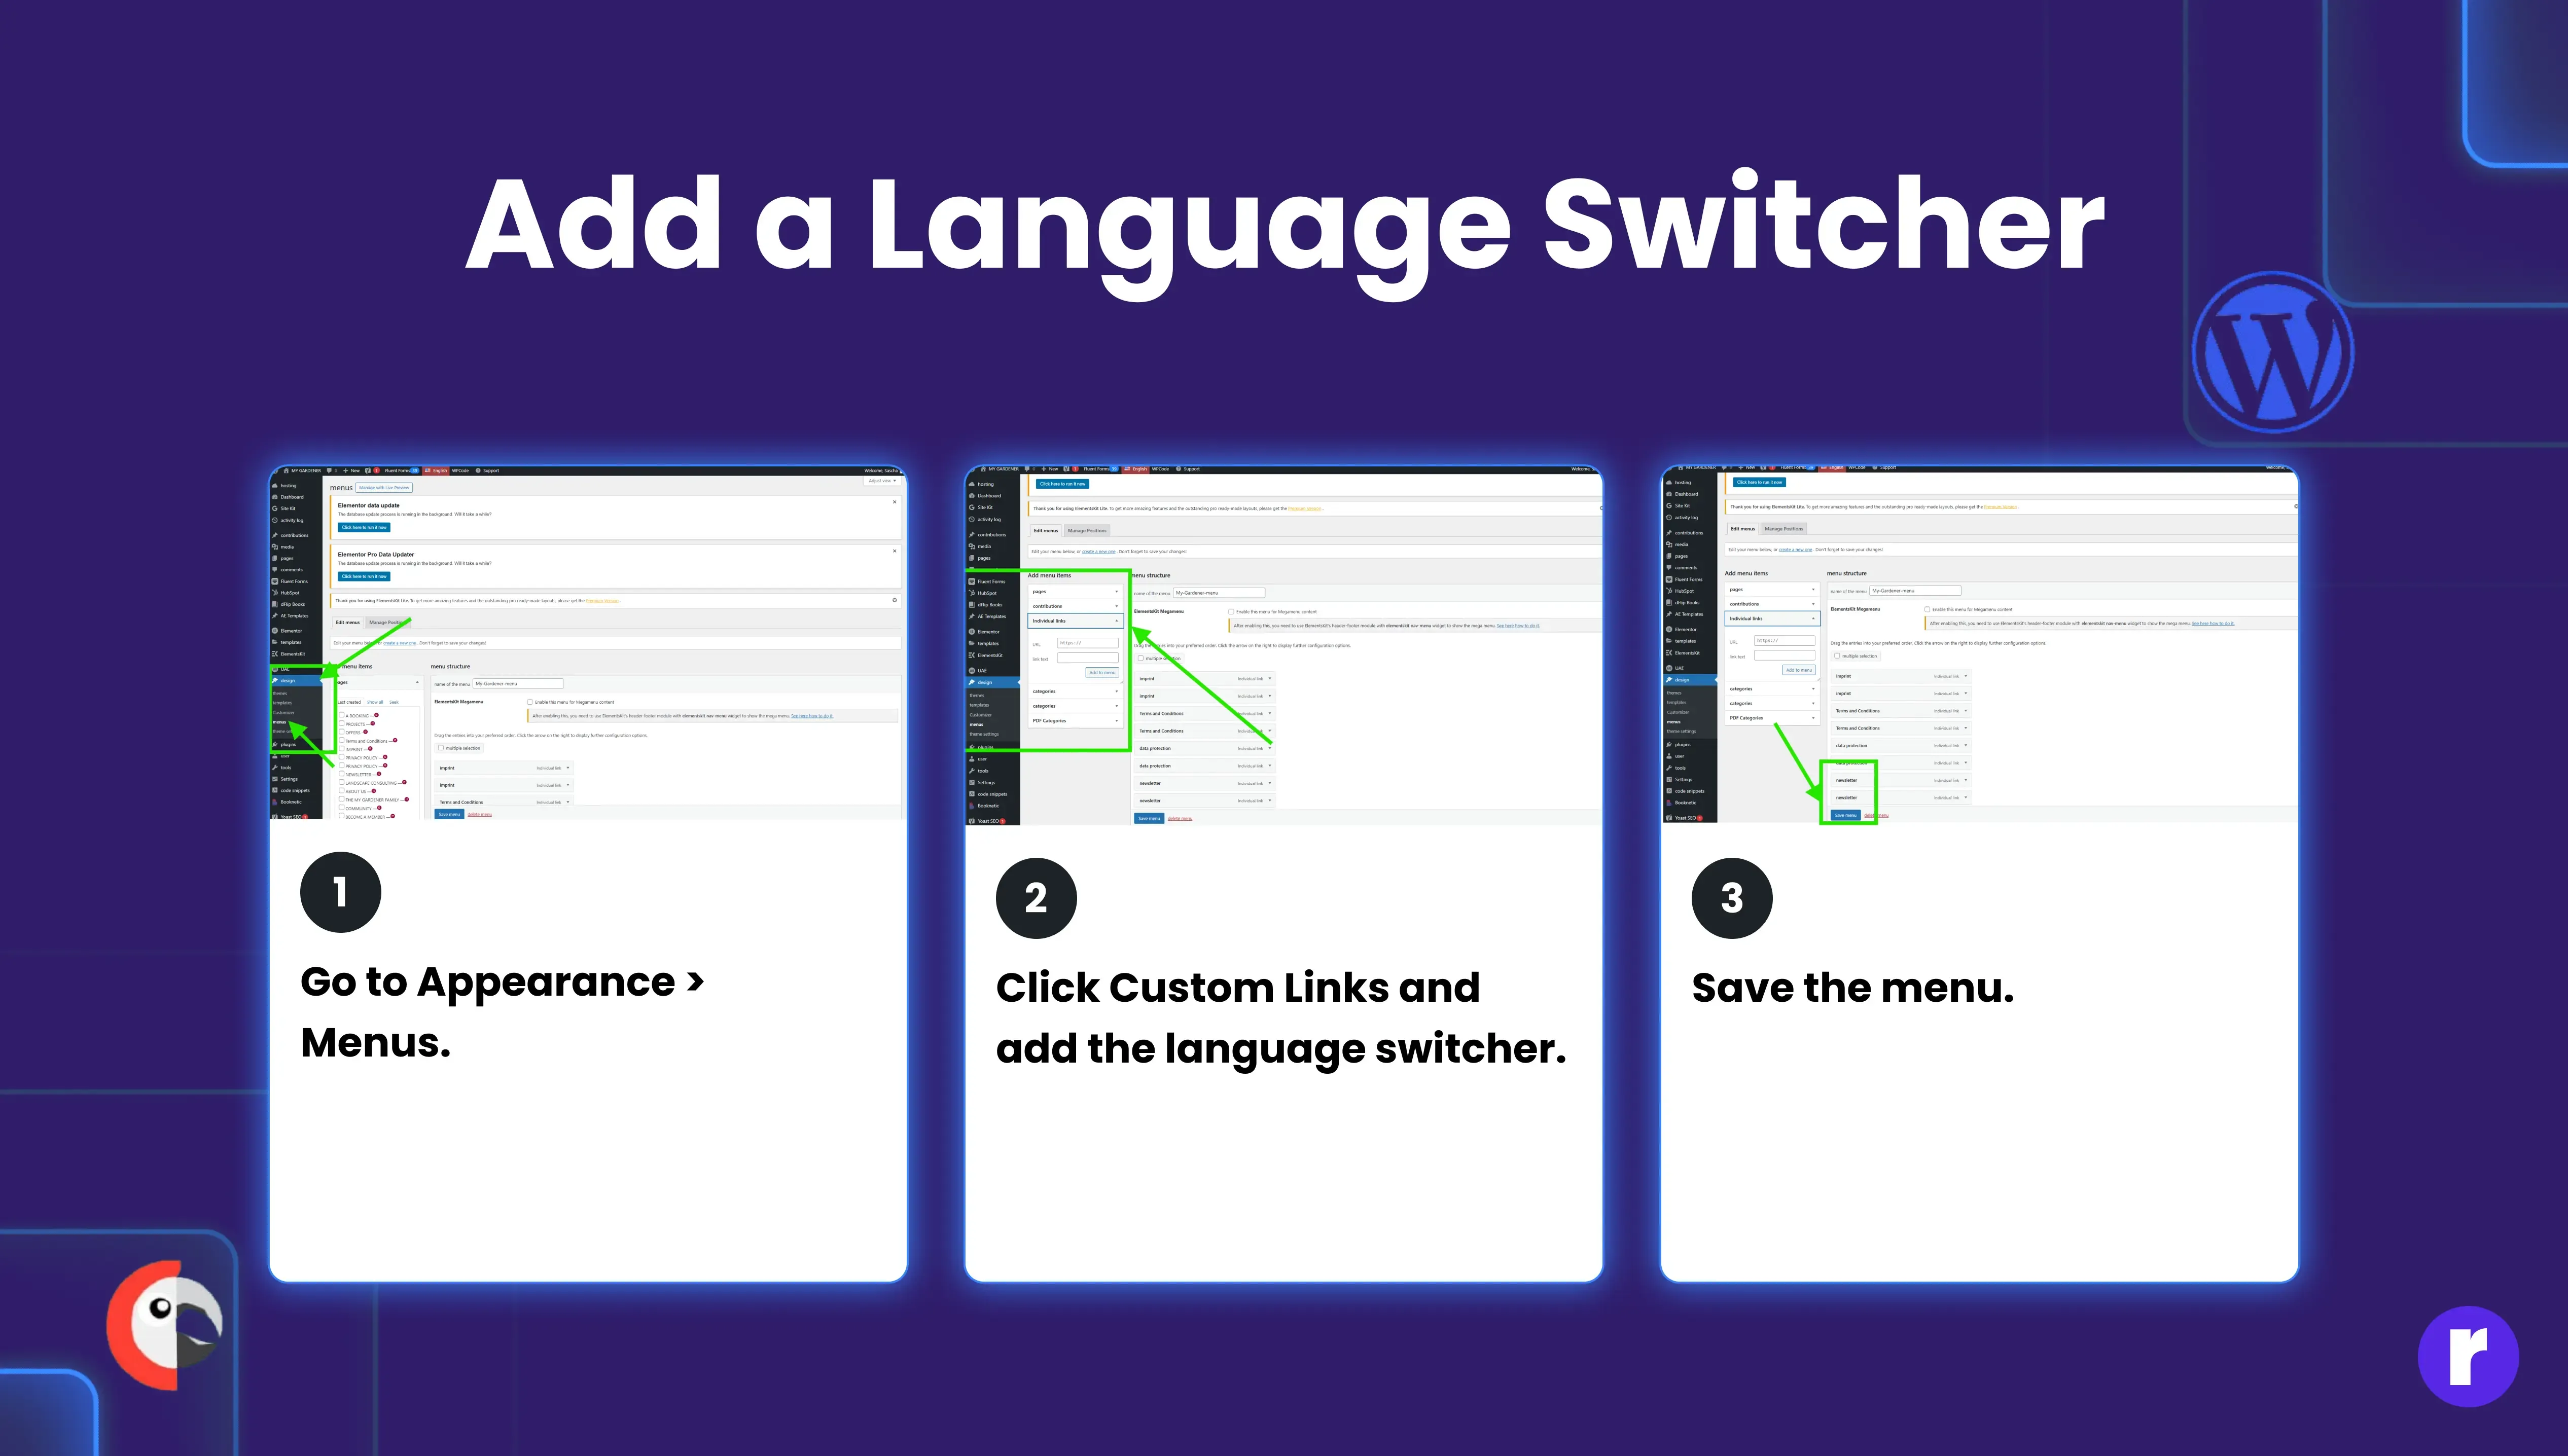
- Go to Appearance > Menus.
- Click Custom Links and add the language switcher.
- Save the menu.
Step 5: Set Up SEO-Friendly URLs

- Go to Languages > Settings.
- Under URL modifications, choose The language is set from content for SEO-friendly URLs.
- Save changes.
Conclusion
Setting up a multilingual website using Polylang is a straightforward process that significantly enhances user experience and global reach. By following the steps outlined above, you can easily configure multiple languages, translate content, and optimize SEO for better visibility. Adding a language switcher ensures seamless navigation, and integrating Polylang with Elementor allows you to maintain design consistency across translations.