How to Create Custom Sections in Shopify Using Liquid

Written by

Priyanka
Front End Developer
Table of contents
Build with Radial Code
Share this


What Do You Need Before Starting?
- A Shopify store (a development store works fine too)
- A little basic knowledge of HTML, CSS, and JavaScript — if you already know these, this task will be much easier for you, since the entire structure of a section is based on these languages
- Access to your Shopify admin panel
Even if you don't know HTML/CSS, you can still follow these steps to create a section, but your customization options will be a bit limited.
Step 1: Start Editing Your Theme
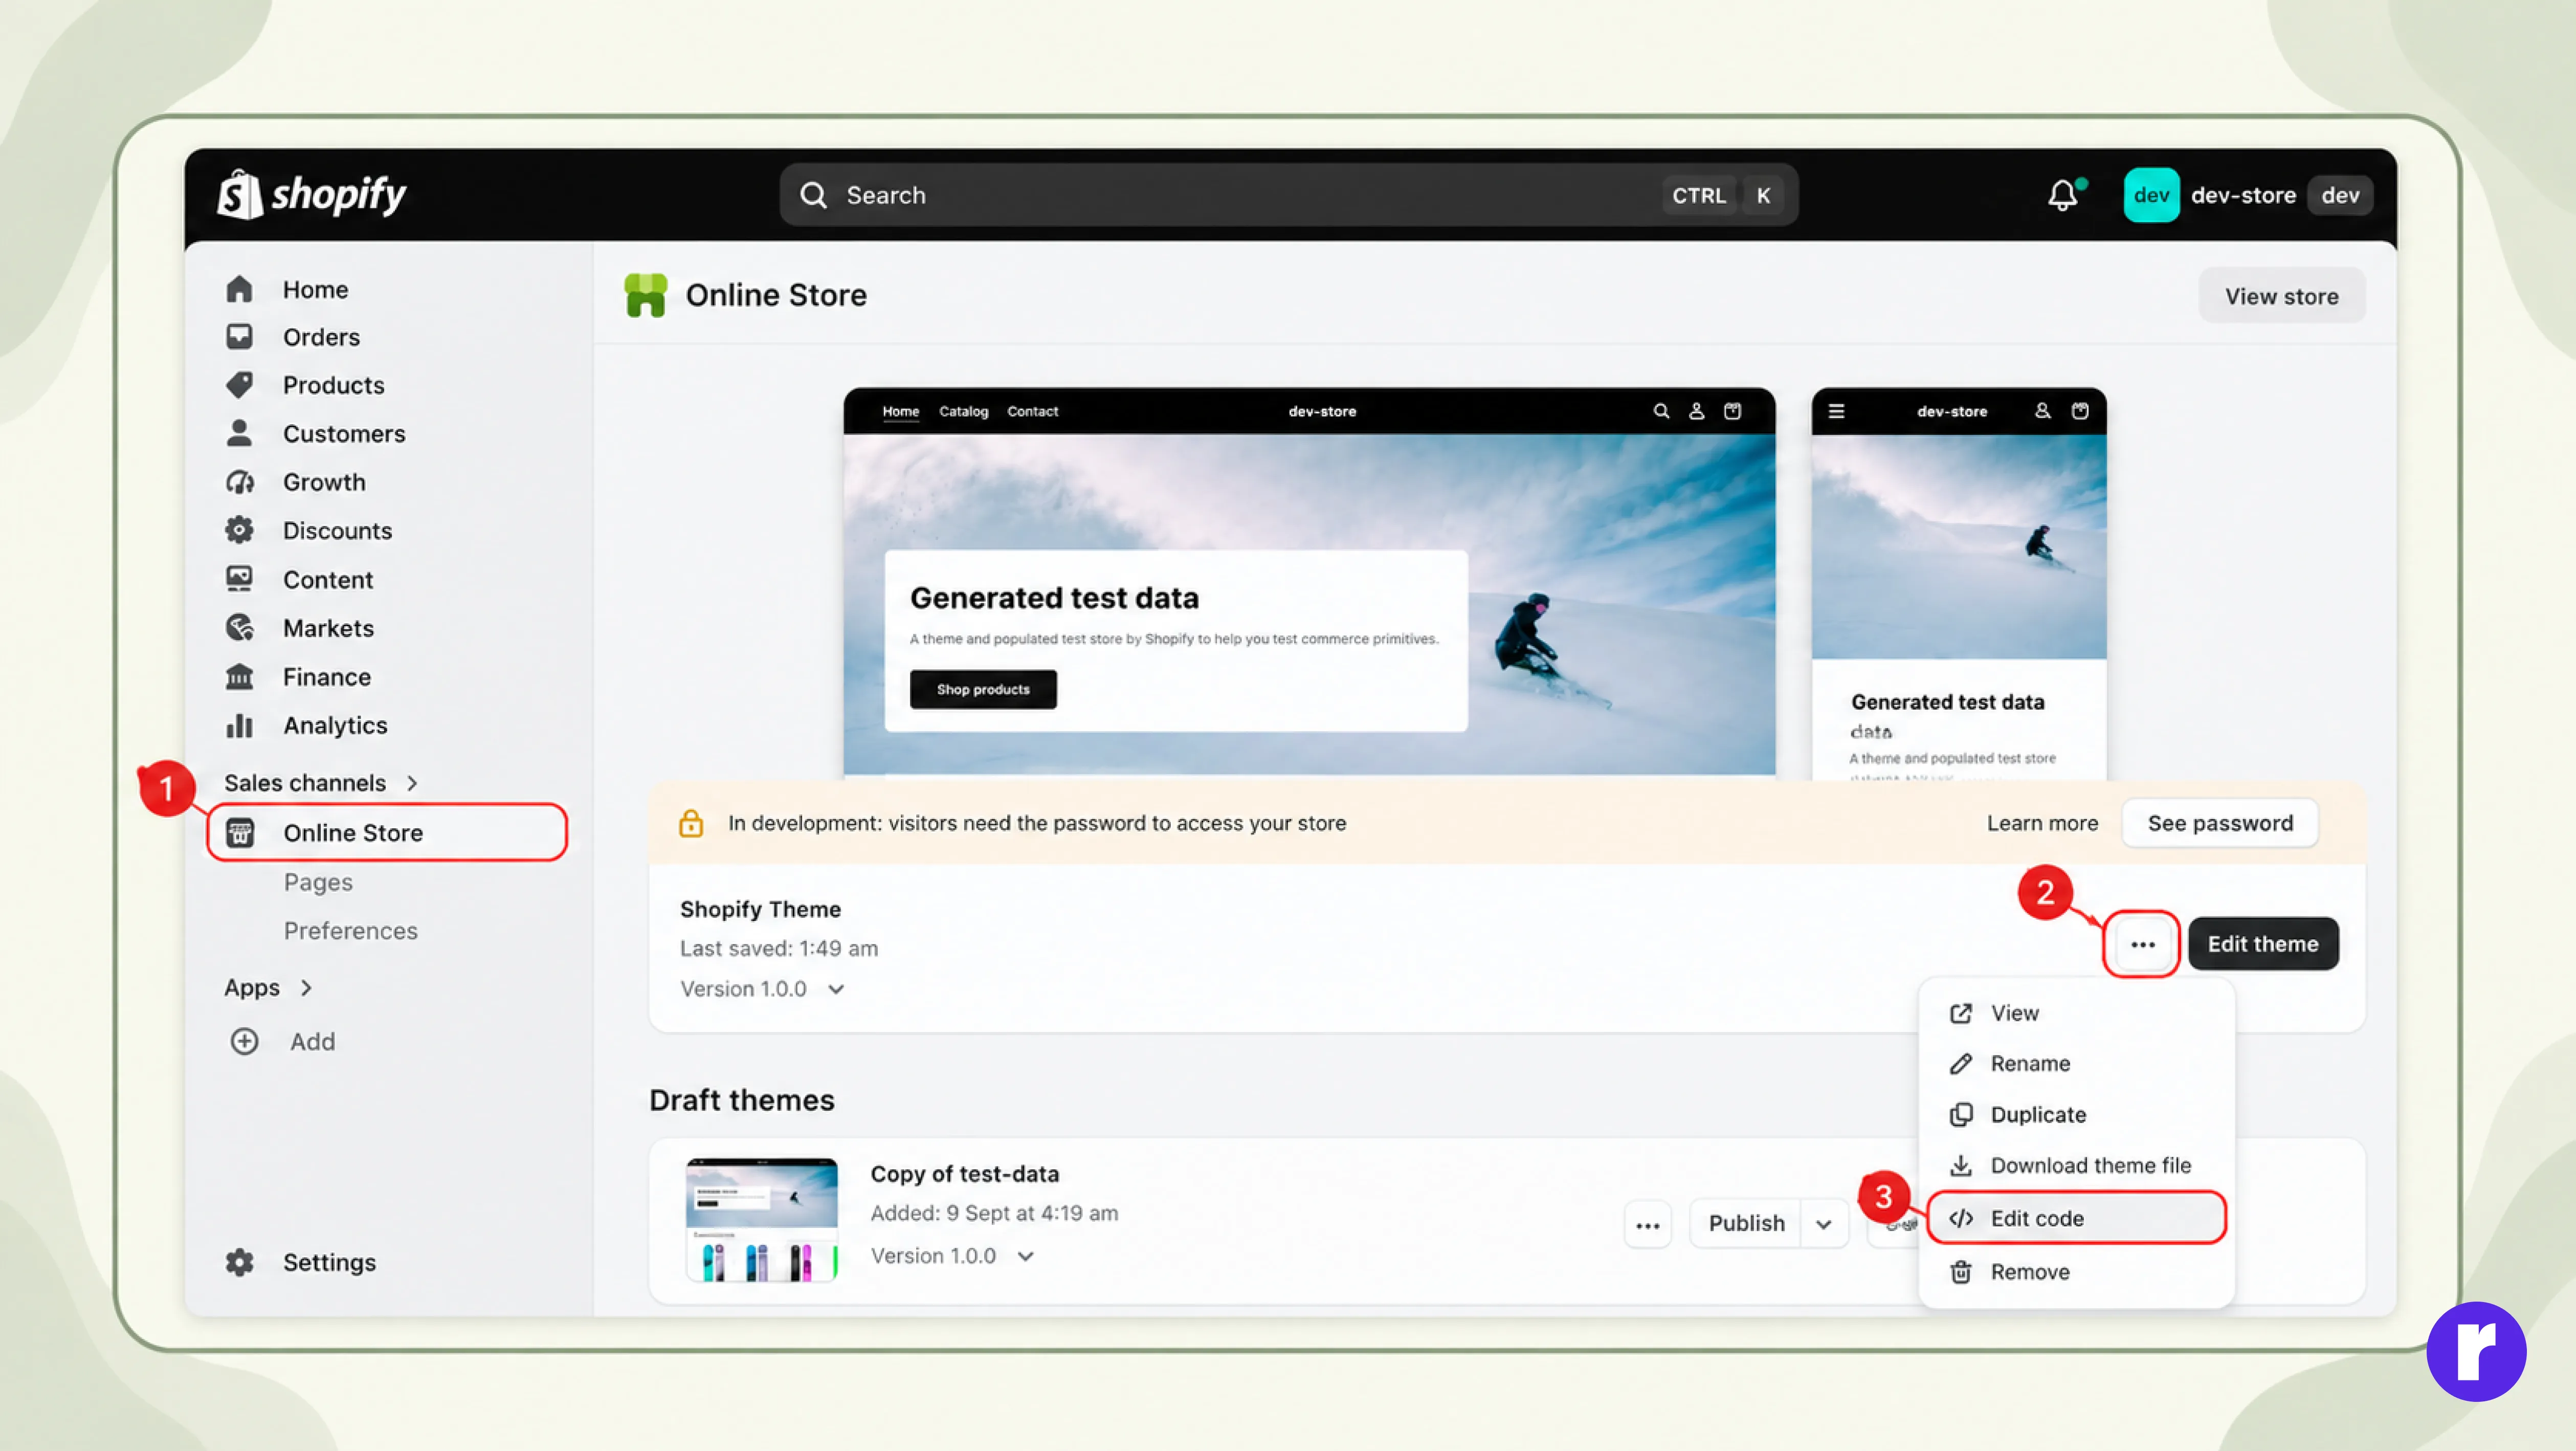
First, go to your Shopify admin panel:
- Click on Online Store
- Next to your theme, you'll see an Actions button — click on it and select Edit Code (this is also referred to as "Edit Theme")
You'll now land directly in the theme's code editor.
Step 2: Open the Sections Folder
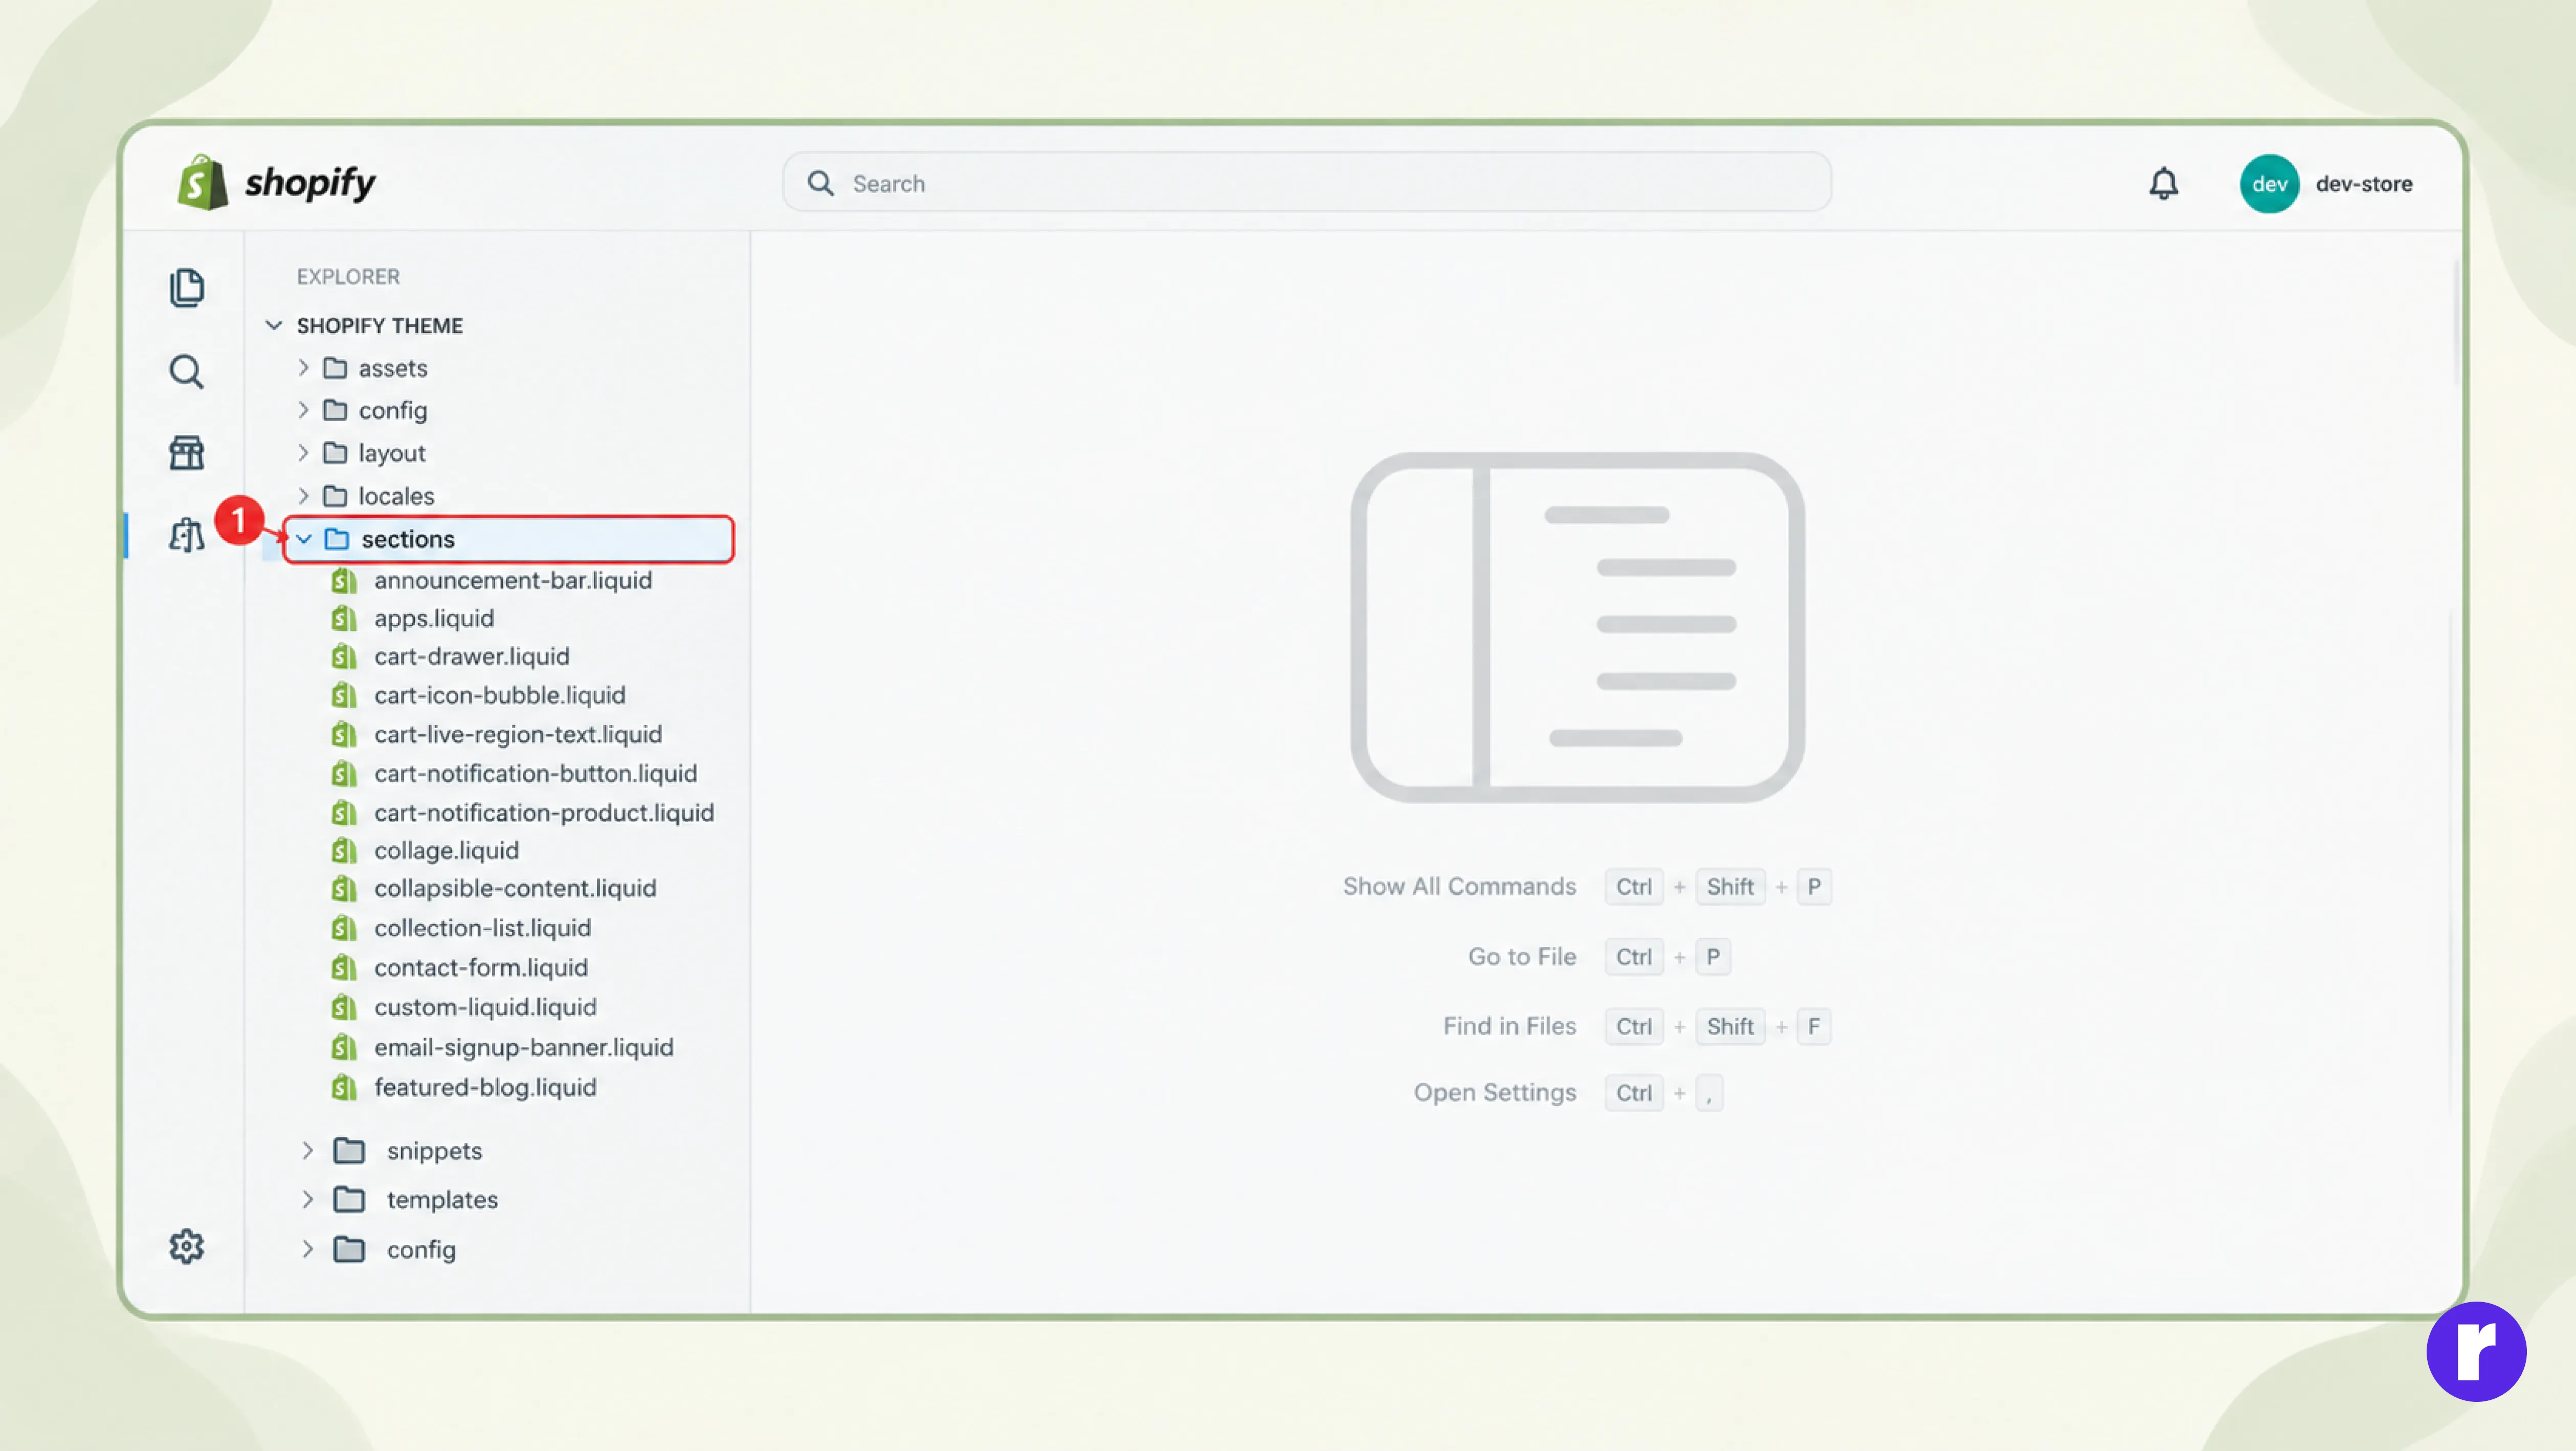
On the left side of the code editor, you'll see a list of folders like layouttemplatessectionssnippets etc.
- Click on the sections folder to open it
- This is where all of Shopify's existing sections (like header, footer, banner) are already stored
Step 3: Create a New File
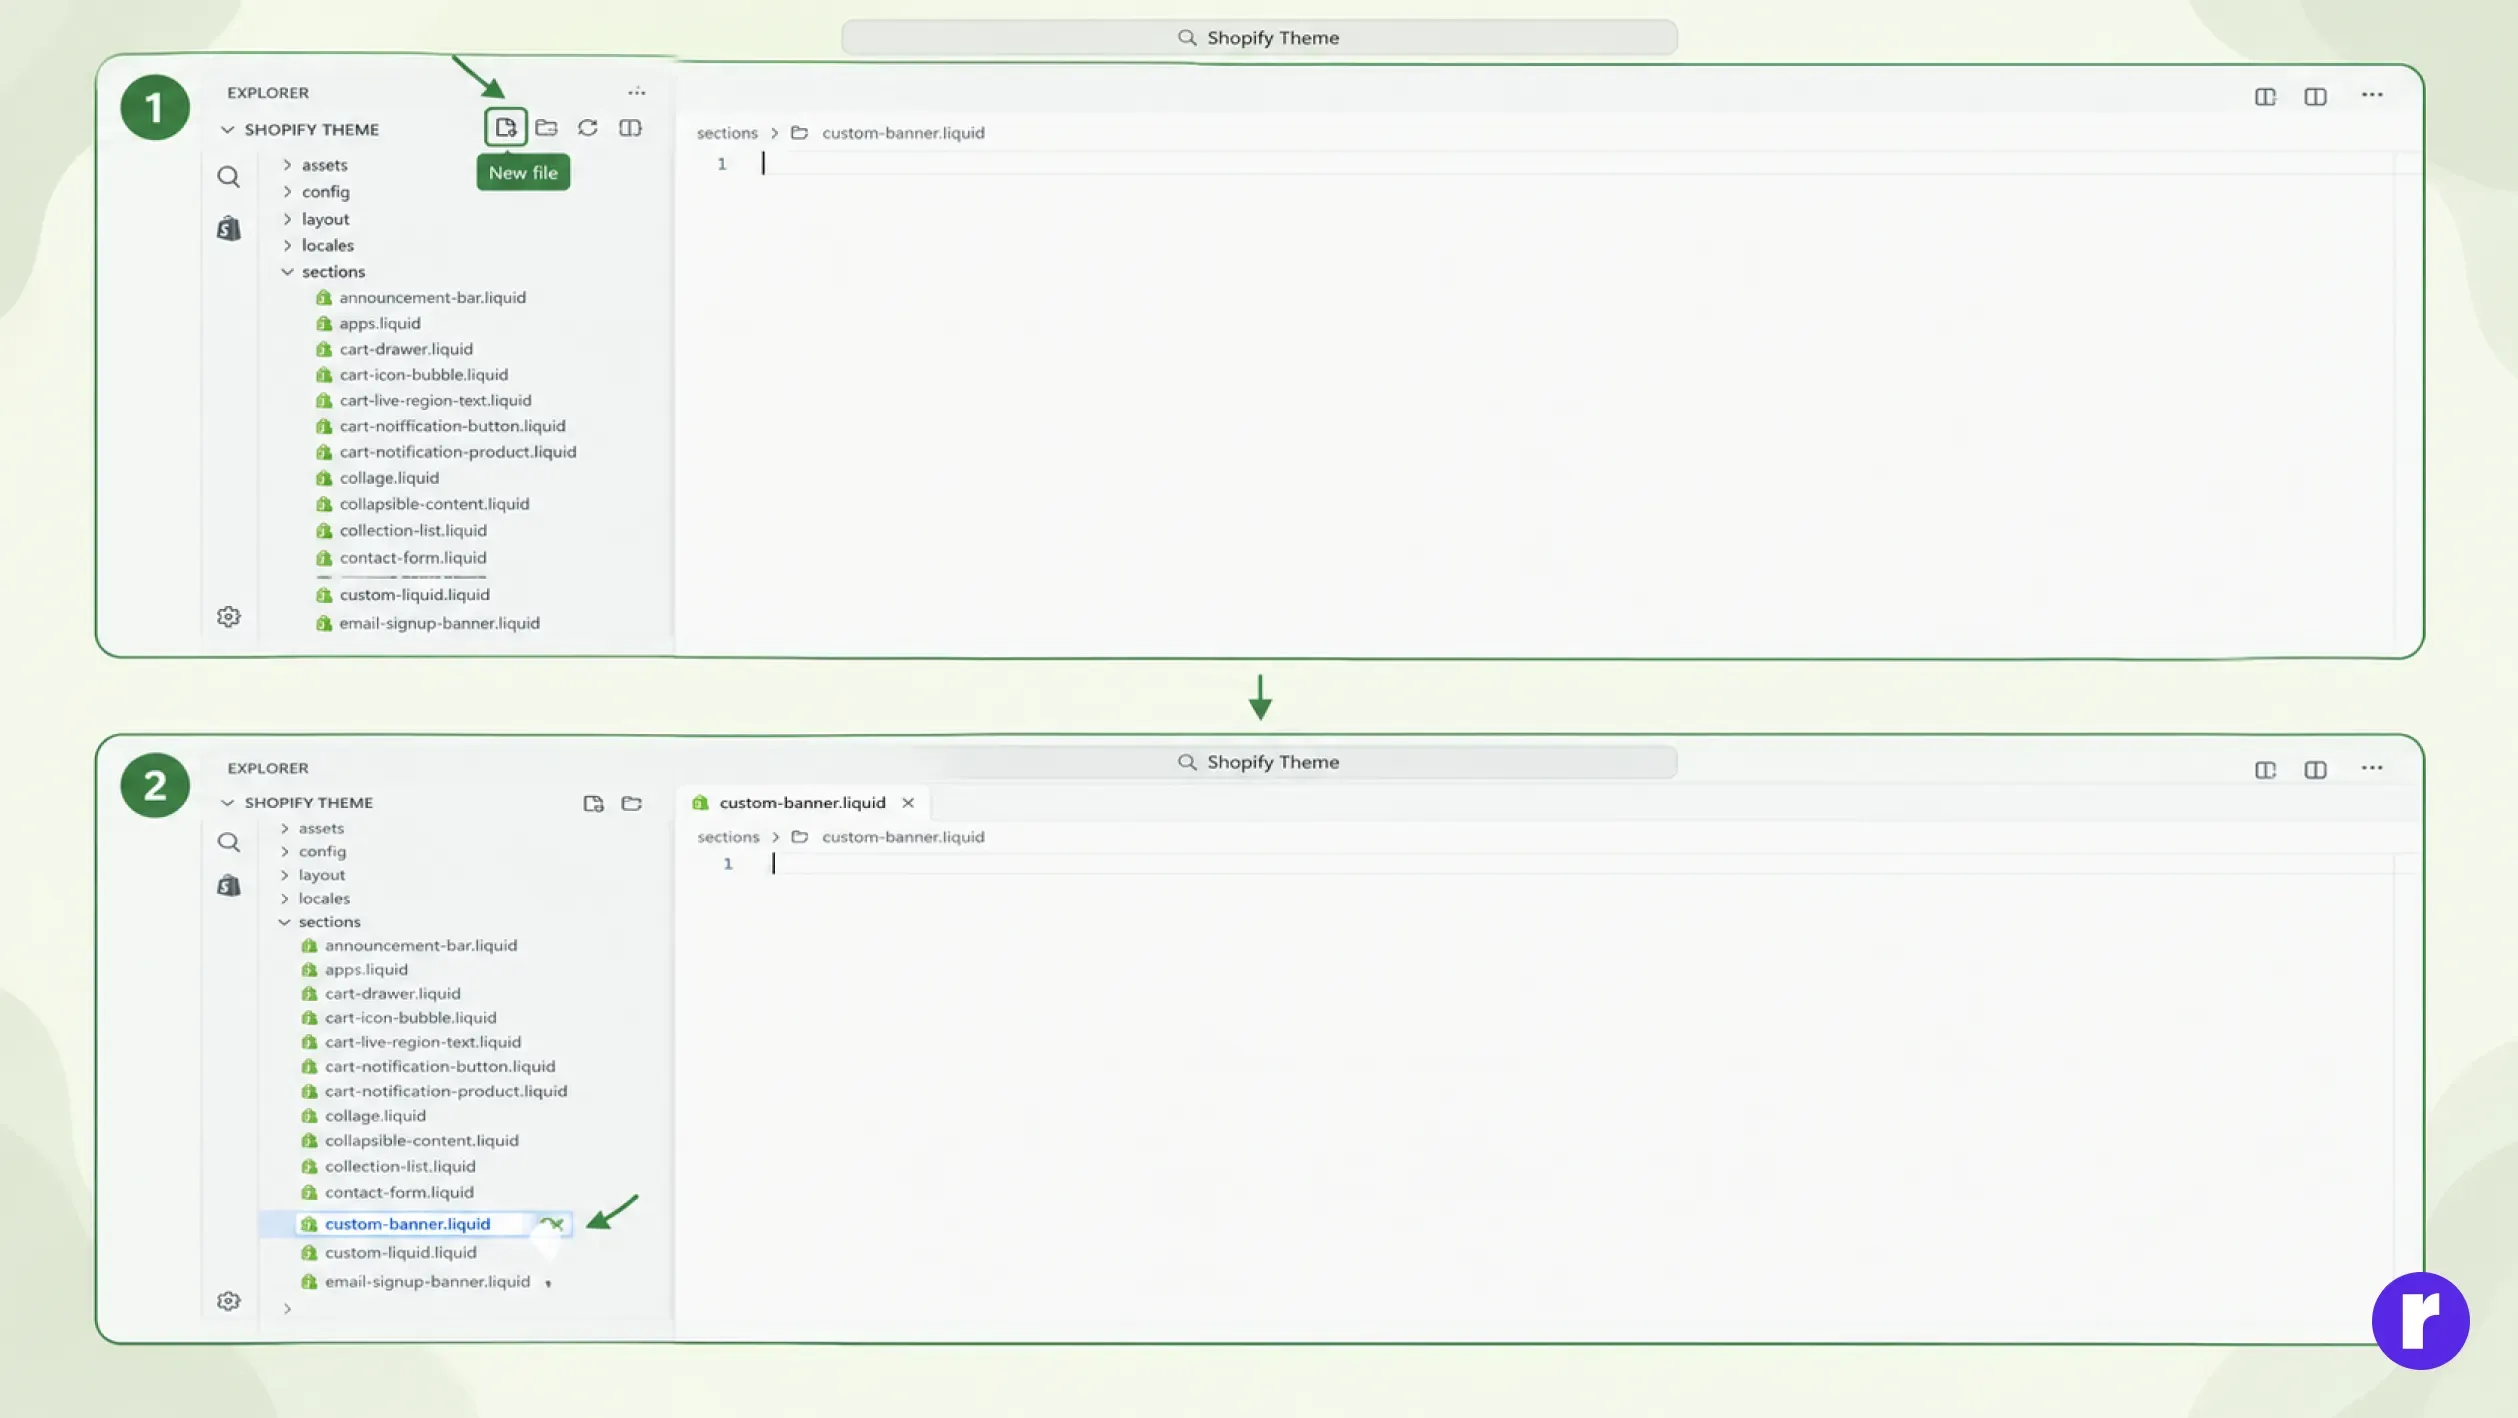
Now we need to create our own section file:
- Inside the sections folder, click on "Add a new section" or "New file"
- Name the file something like custom-banner.liquid
- Make sure to use the .liquid extension, otherwise Shopify won't recognize it
Step 4: Start Coding (HTML Part)
Now that the file is created, you'll get a blank editor. This is where you'll start writing the code. First, add the HTML structure that will form the basic layout of your section:
<div class="custom-banner">
 <h2>{{ section.settings.heading }}</h2>
 <p>{{ section.settings.subheading }}</p>

 {% if section.settings.button_label != blank %}
  <a href="{{ section.settings.button_link }}" class="custom-banner__btn">
   {{ section.settings.button_label }}
  </a>
 {% endif %}
</div>
Here, {{ section.settings.xyz }} is where your content will appear dynamically. This means the merchant will be able to change this content themselves from the Shopify theme editor.
For example, section.settings.heading gets the value entered in the Heading setting, while section.settings.button_label gets the button text.
Step 5: Add the Schema (To Create Settings)
Now we need to add a schema so this section shows up in Shopify's theme customizer and its settings can be edited.
Add this code below the HTML code in the same file:
{% schema %}
{
  "name": "Custom Banner",
  "settings": [
    {
      "type": "text",
      "id": "heading",
      "label": "Heading",
      "default": "Welcome to Our Store"
    },
    {
      "type": "text",
      "id": "subheading",
      "label": "Subheading"
    },
    {
      "type": "text",
      "id": "button_label",
      "label": "Button Text"
    },
    {
      "type": "url",
      "id": "button_link",
      "label": "Button Link"
    }
  ],
  "presets": [
    {
      "name": "Custom Banner"
    }
  ]
}
{% endschema %}
This schema decides what the merchant will be able to edit in the customizer, such as the heading, subheading, button text, and button link.
The presets also make the section available in the Add Section list inside the theme editor.
Step 6: Add CSS (For Styling)
To make the section look good, add some CSS too. You can write this in the same file inside a <style> tag.
Add the following code:
<style>
 .custom-banner {
    padding: 50px 20px;
    text-align: center;
    background-color: #f4f4f4;
  }

  .custom-banner__btn {
    display: inline-block;
    margin-top: 15px;
    padding: 10px 25px;
    background: #000;
    color: #fff;
    border-radius: 5px;
    text-decoration: none;
  }
</style>
If you know CSS, you can customize the look here however you like — colors, spacing, fonts, and more.
If you want to learn more about Shopify development, explore our Shopify blog for more guides, tutorials, and practical tips.
Step 7: Save the File
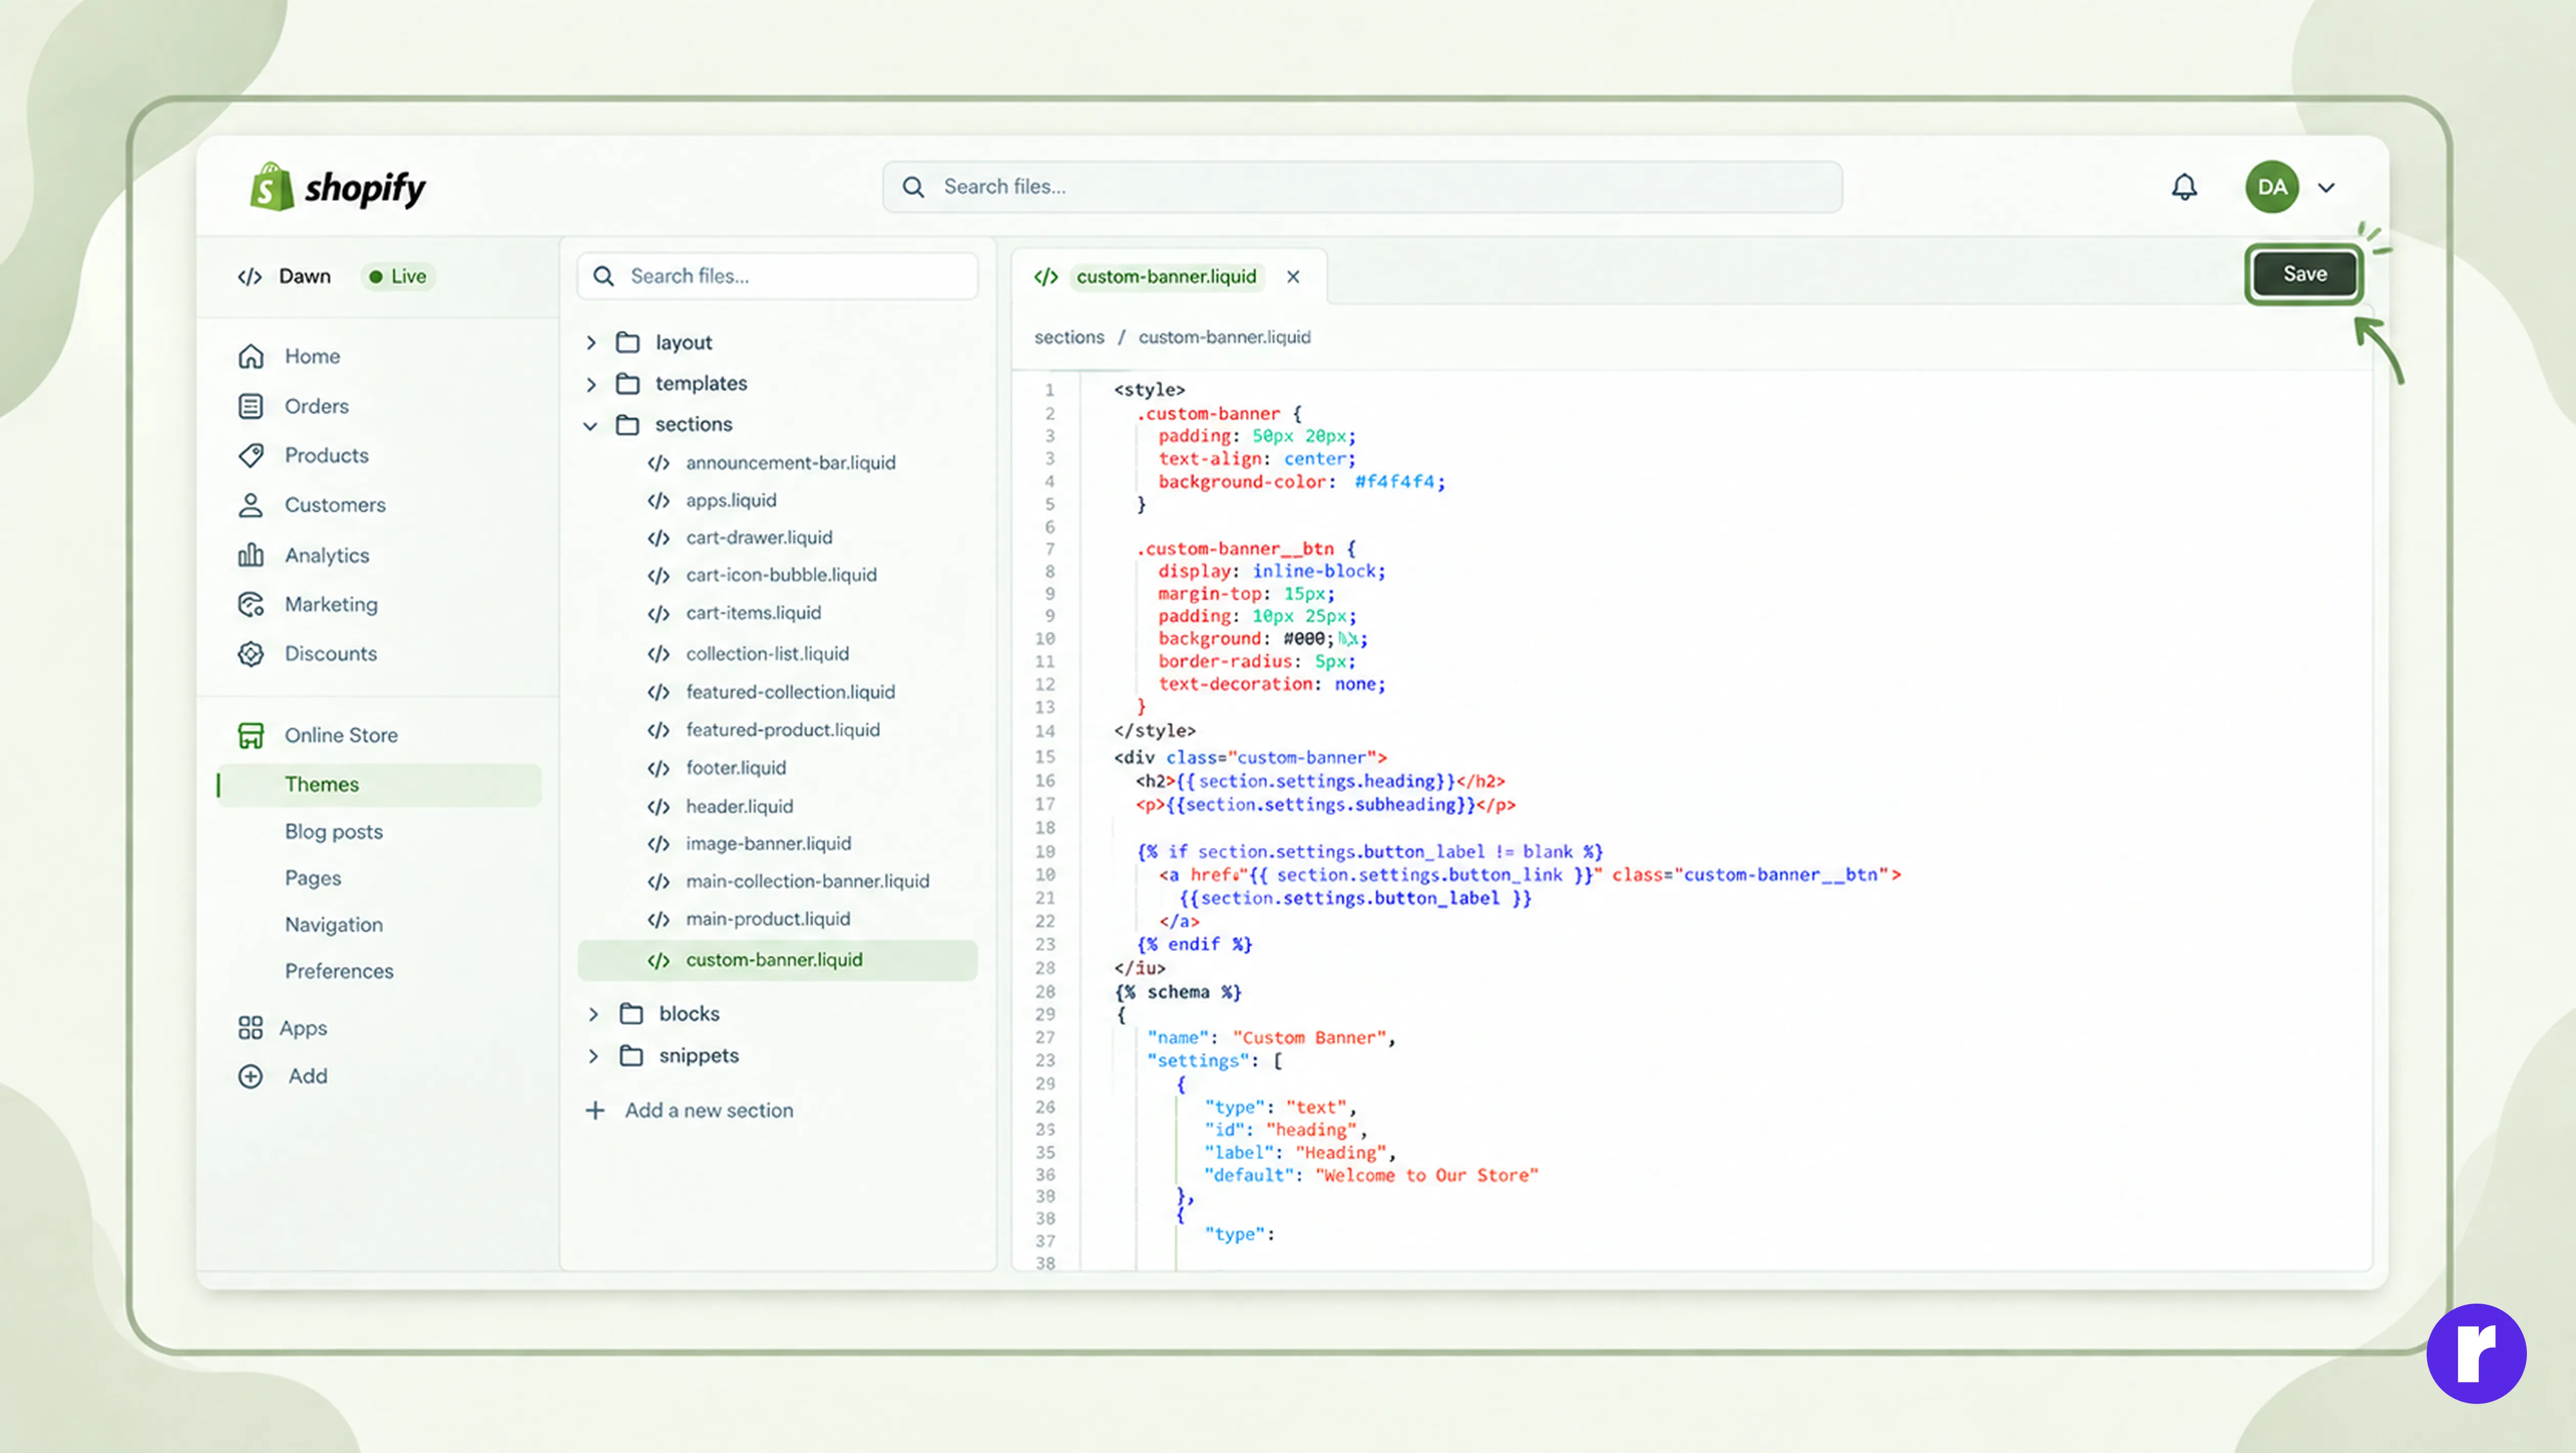
Once you've finished writing the code, you need to save the file. You can save your Shopify section in two ways:
- Click the Save button in the top-right corner of the code editor.
- Use the keyboard shortcut Ctrl + S on Windows.
Both methods will save the changes you've made to the file.
Tip: Always make sure your code is saved before leaving the code editor or moving to another file.
Step 8: Add the Section to a Page
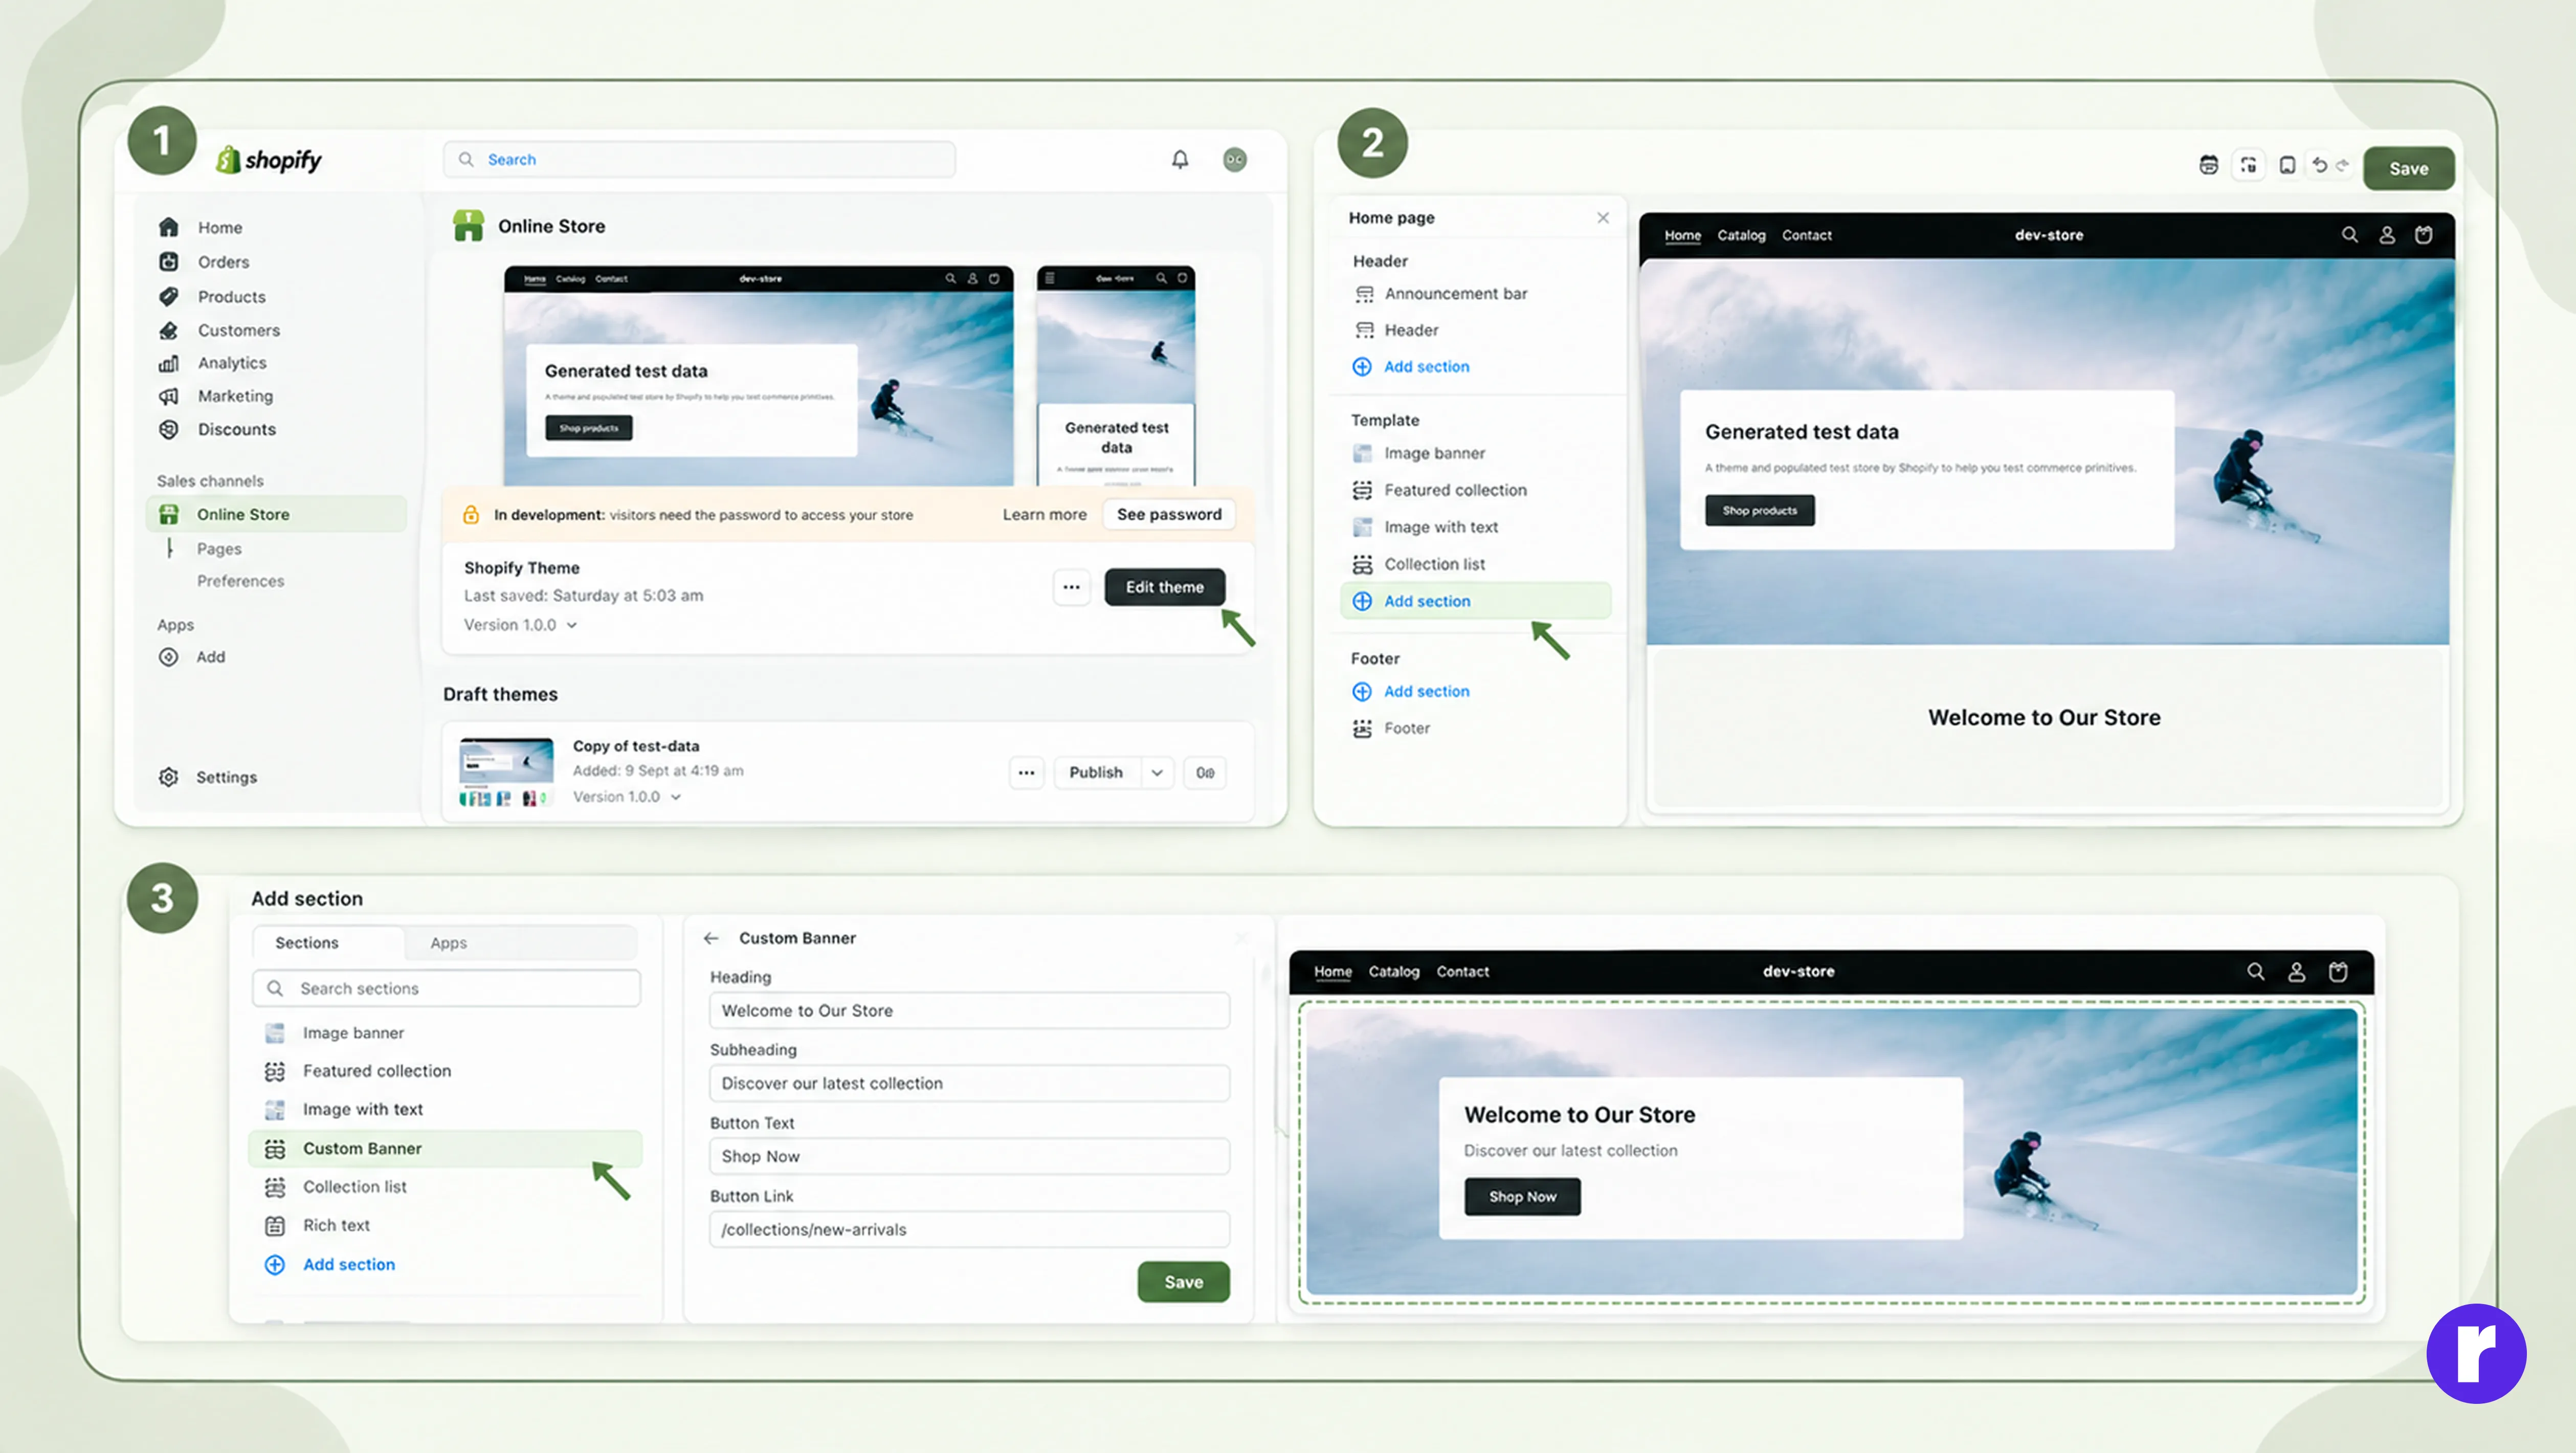
Once you've finished writing the code, you need to save the file. You can save your Shopify section in two ways:
- Click the Save button in the top-right corner of the code editor.
- Use the keyboard shortcut Ctrl + S on Windows.
Both methods will save the changes you've made to the file.
Tip: Always make sure your code is saved before leaving the code editor or moving to another file.
Conclusion
Creating a custom section isn't as hard as it sounds. You just need to edit your theme, create a new file in the sections folder, structure it with HTML and Liquid, add settings with schema, style it with CSS, save the file, and finally add the section to a page through the theme customizer.
If you have a basic understanding of HTML, CSS, and JavaScript, creating and customizing Shopify sections becomes even easier.
For more advanced Shopify customization and development support, visit Radial Code