How to Set Up Your First Shopify Store from Scratch

Written by
Nupur Bishnoi
Shopify Developer

Sonam Bishnoi
Shopify Developer

Table of contents
Build with Radial Code
Share this


Launching your first Shopify store might feel overwhelming — but it doesn’t have to be. Shopify makes it easy for anyone, even without coding experience, to build a beautiful, fully functional online store. In this guide, you’ll learn step-by-step how to set up your Shopify store from scratch, from signing up to launching your first product.
Step 1: Sign Up for a Shopify Account
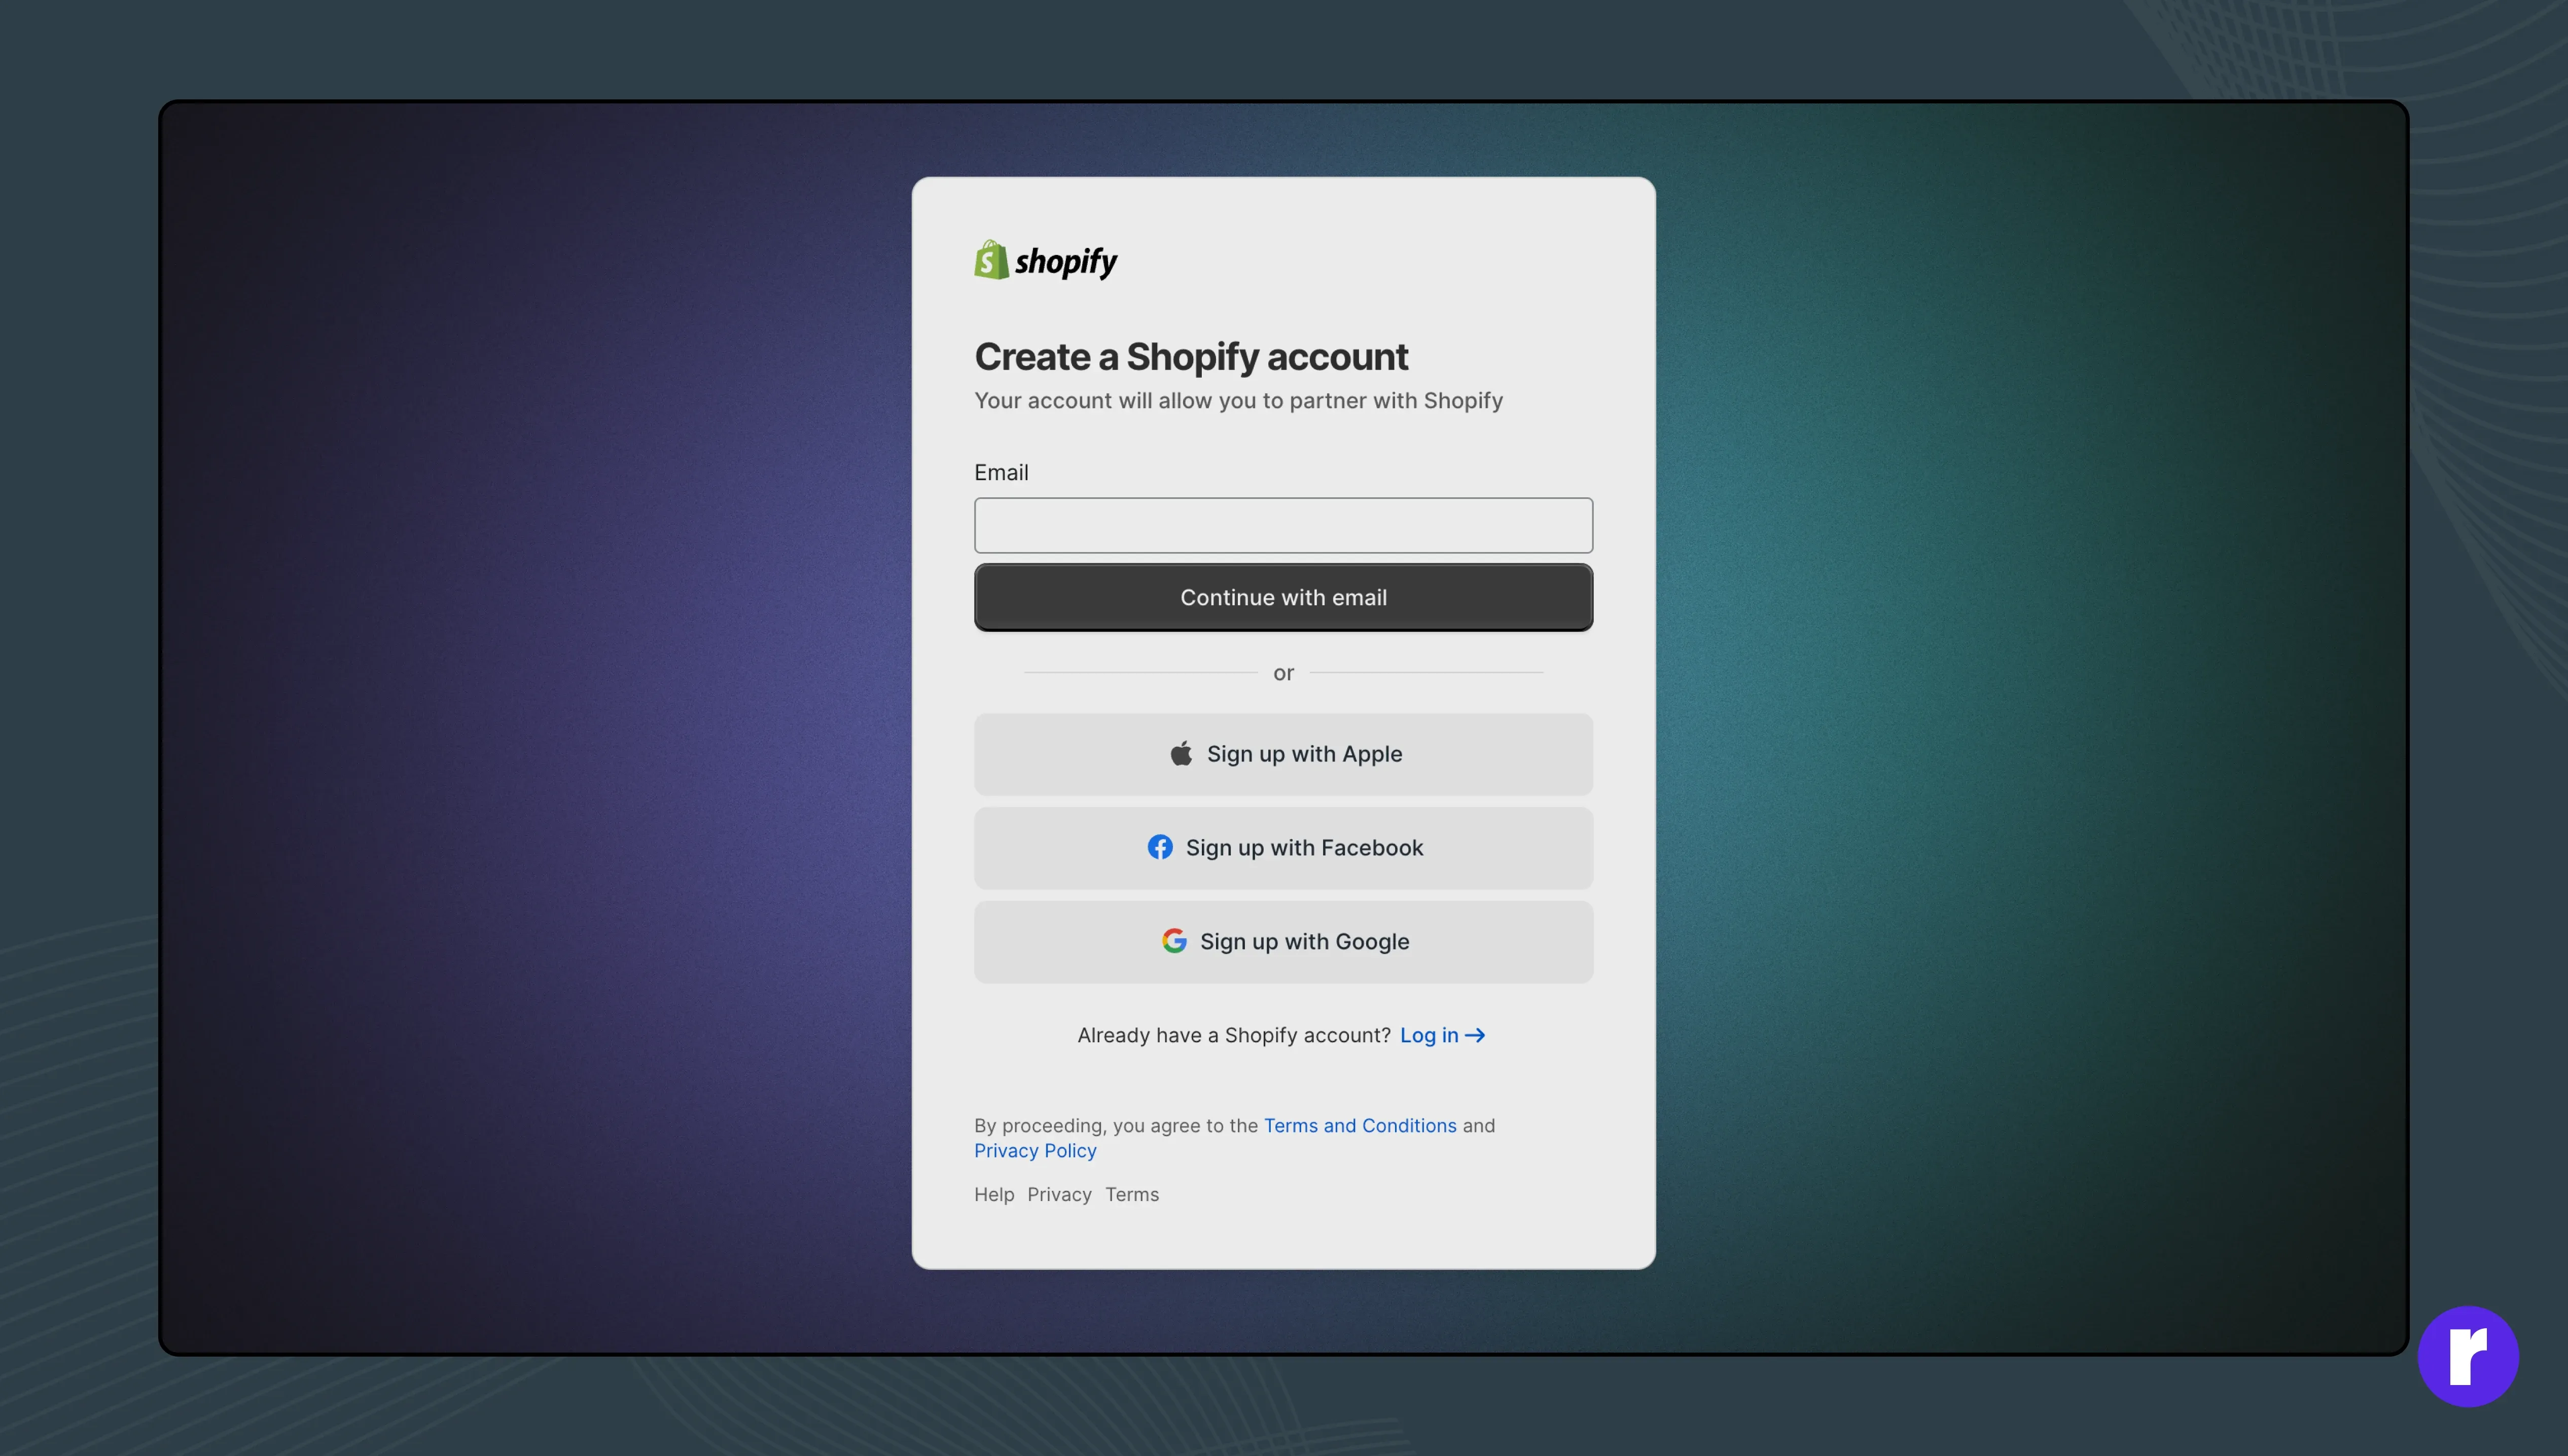
Start by visiting Shopify.com and click “Start Free Trial.”
You’ll be asked to enter:
- Your email address
- Store name (you can change it later)
- A password
- Shopify will then guide you through basic setup questions — like your business type and what you plan to sell — to personalize your experience.
Pro Tip: Choose a store name that’s simple, memorable, and matches your brand vision.
Step 2: Set Up Your Shopify Dashboard
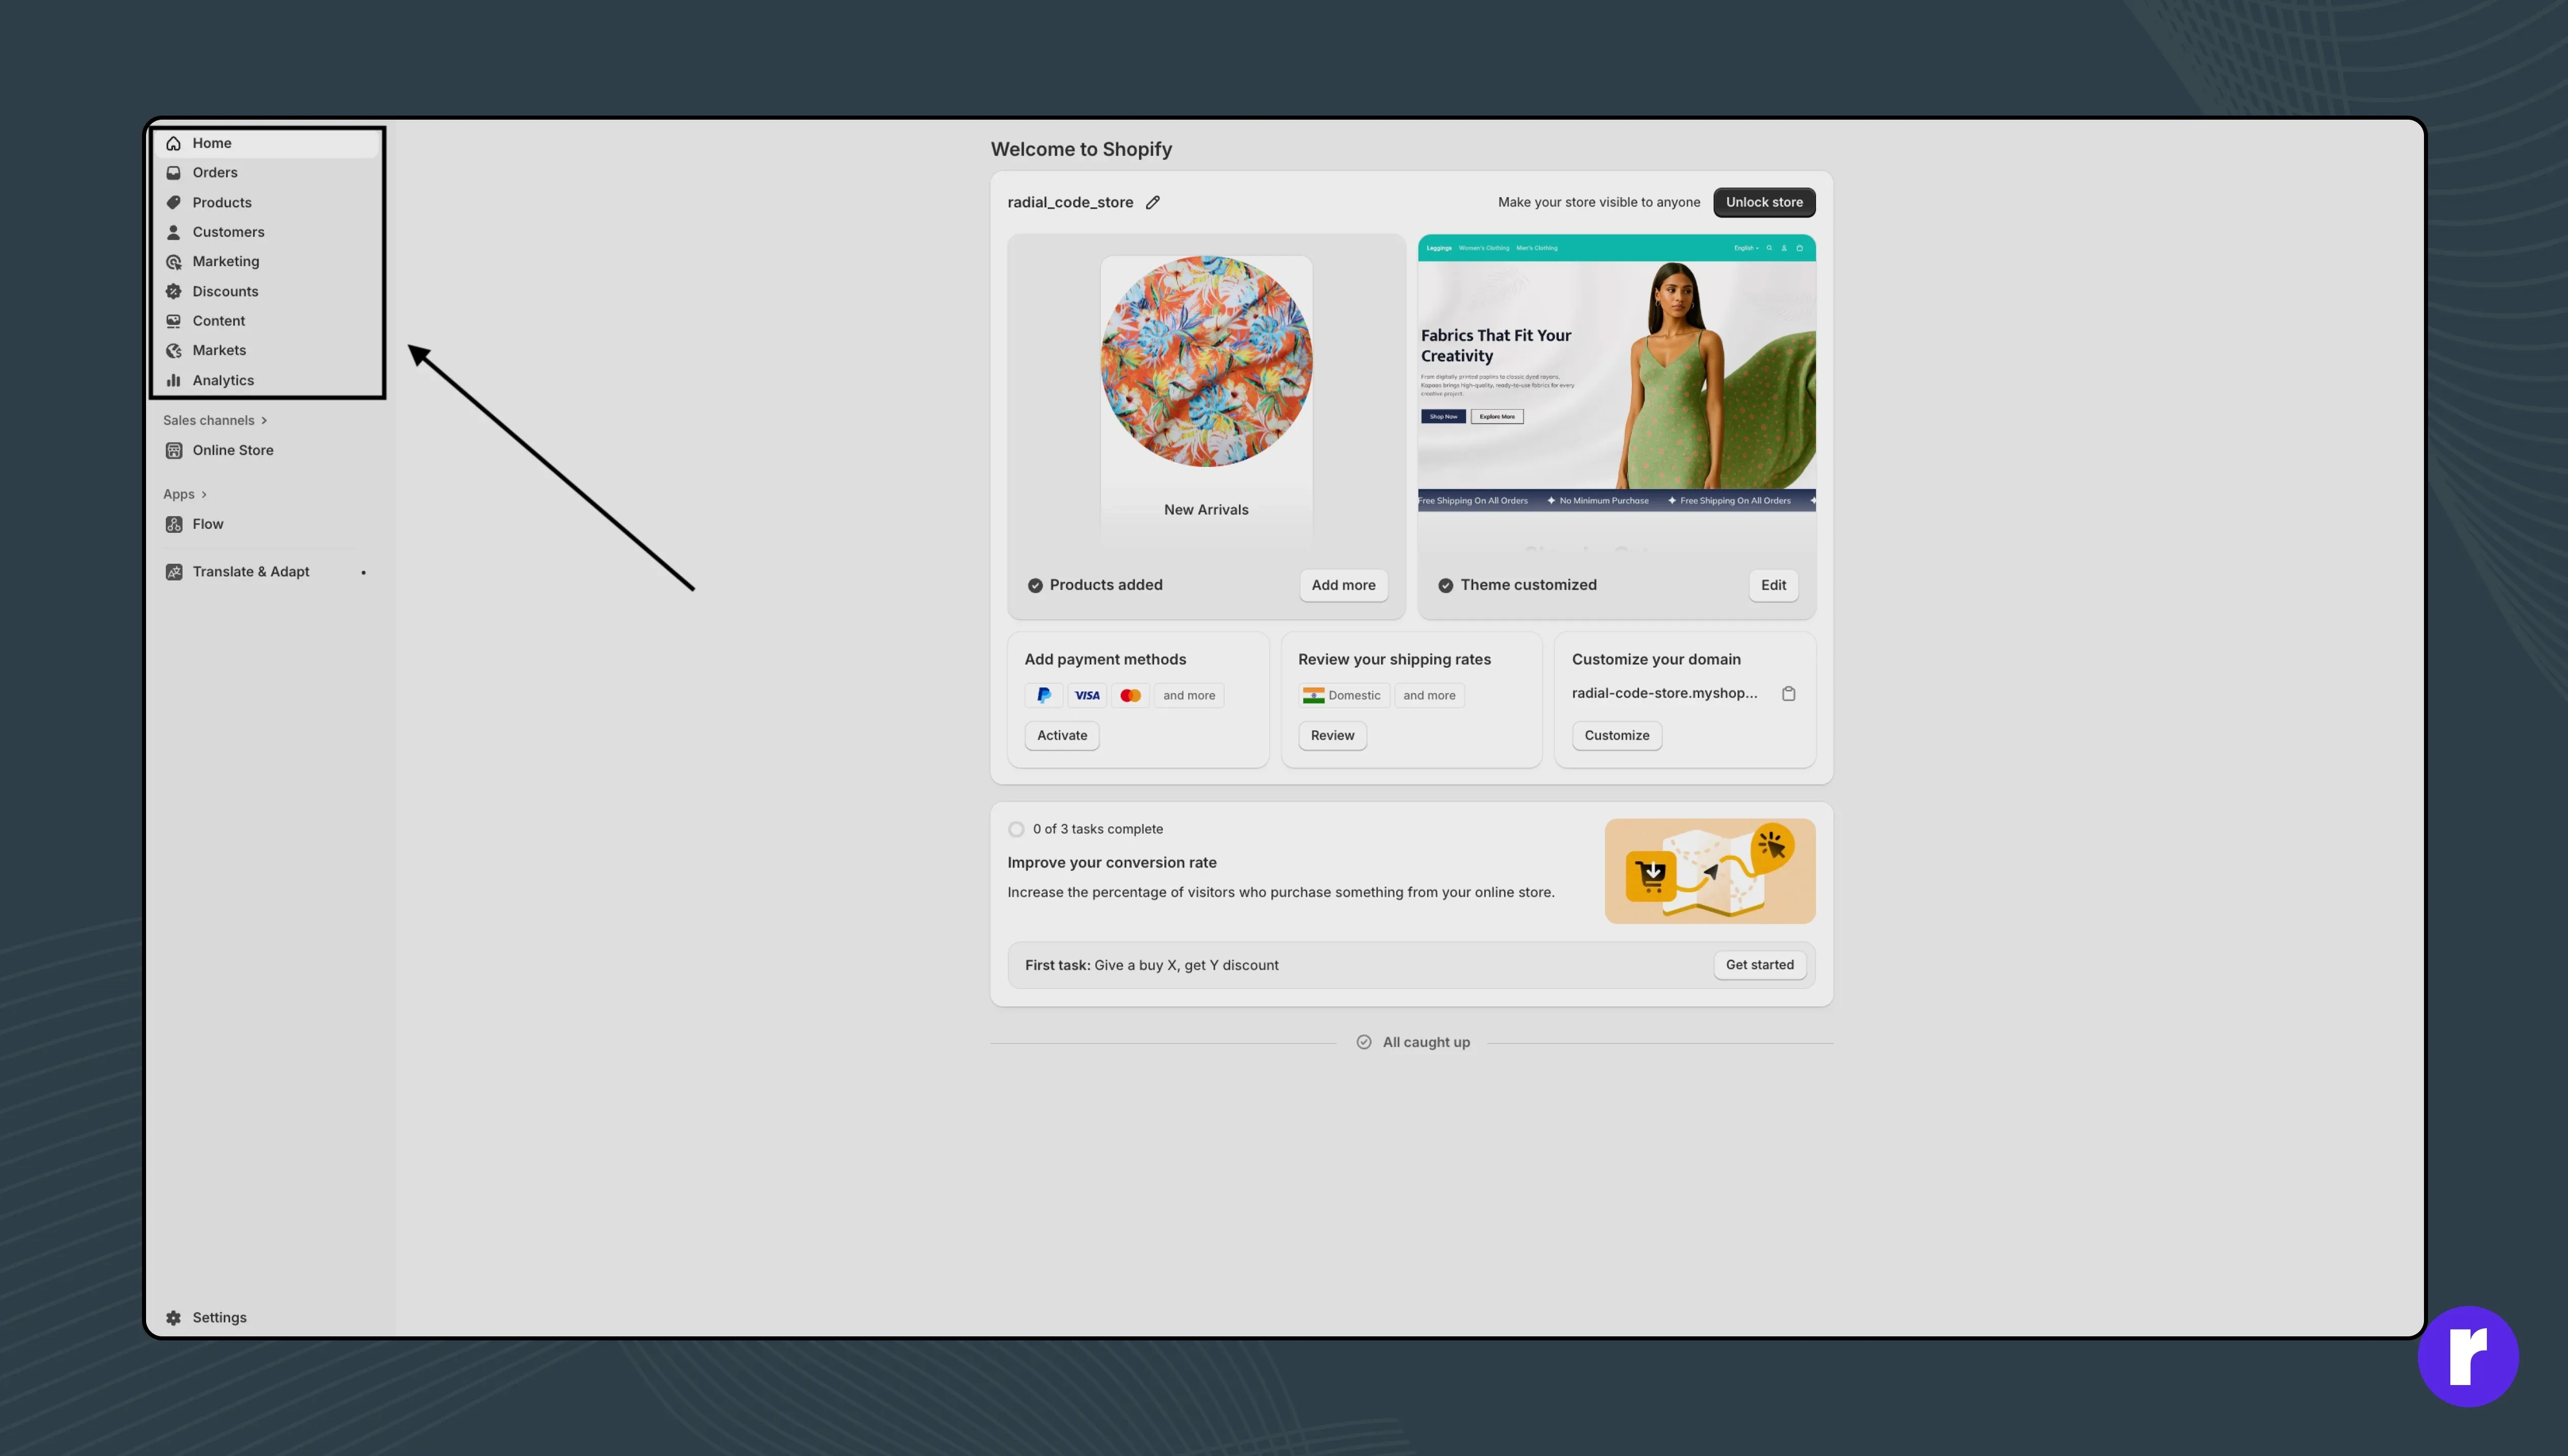
Once inside the dashboard (called the Shopify Admin), you’ll find:
- Home – Overview and recommendations
- Products – Add and manage your inventory
- Online Store – Customize your website design
- Settings – Manage payments, shipping, and checkout options
Take a few minutes to explore this dashboard — it’s where you’ll run your entire business.
Step 3: Add Your First Product

Navigate to Products → Add Product.
Fill out the following details carefully:
- Title: Name of your product
- Description: Explain what it is and why it’s valuable
- Images: Upload high-quality product photos (preferably 3–5 per product)
- Pricing: Add your selling price and compare-at price if needed
- Inventory: Track stock levels
- Shipping: Add weight and delivery details
Pro Tip: Use relevant keywords in your product title and description to improve SEO.
Step 4: Choose and Customize a Theme

Go to Online Store → Themes.
Shopify offers both free and paid themes through the Shopify Theme Store.
Once you’ve picked a theme:
- Click
- Adjust layout, colors, fonts, and sections using the drag-and-drop builder.
- Preview changes in desktop and mobile view.
Pro Tip: Keep your design clean and consistent — white space and simple fonts build trust.
Step 5: Set Up Payments
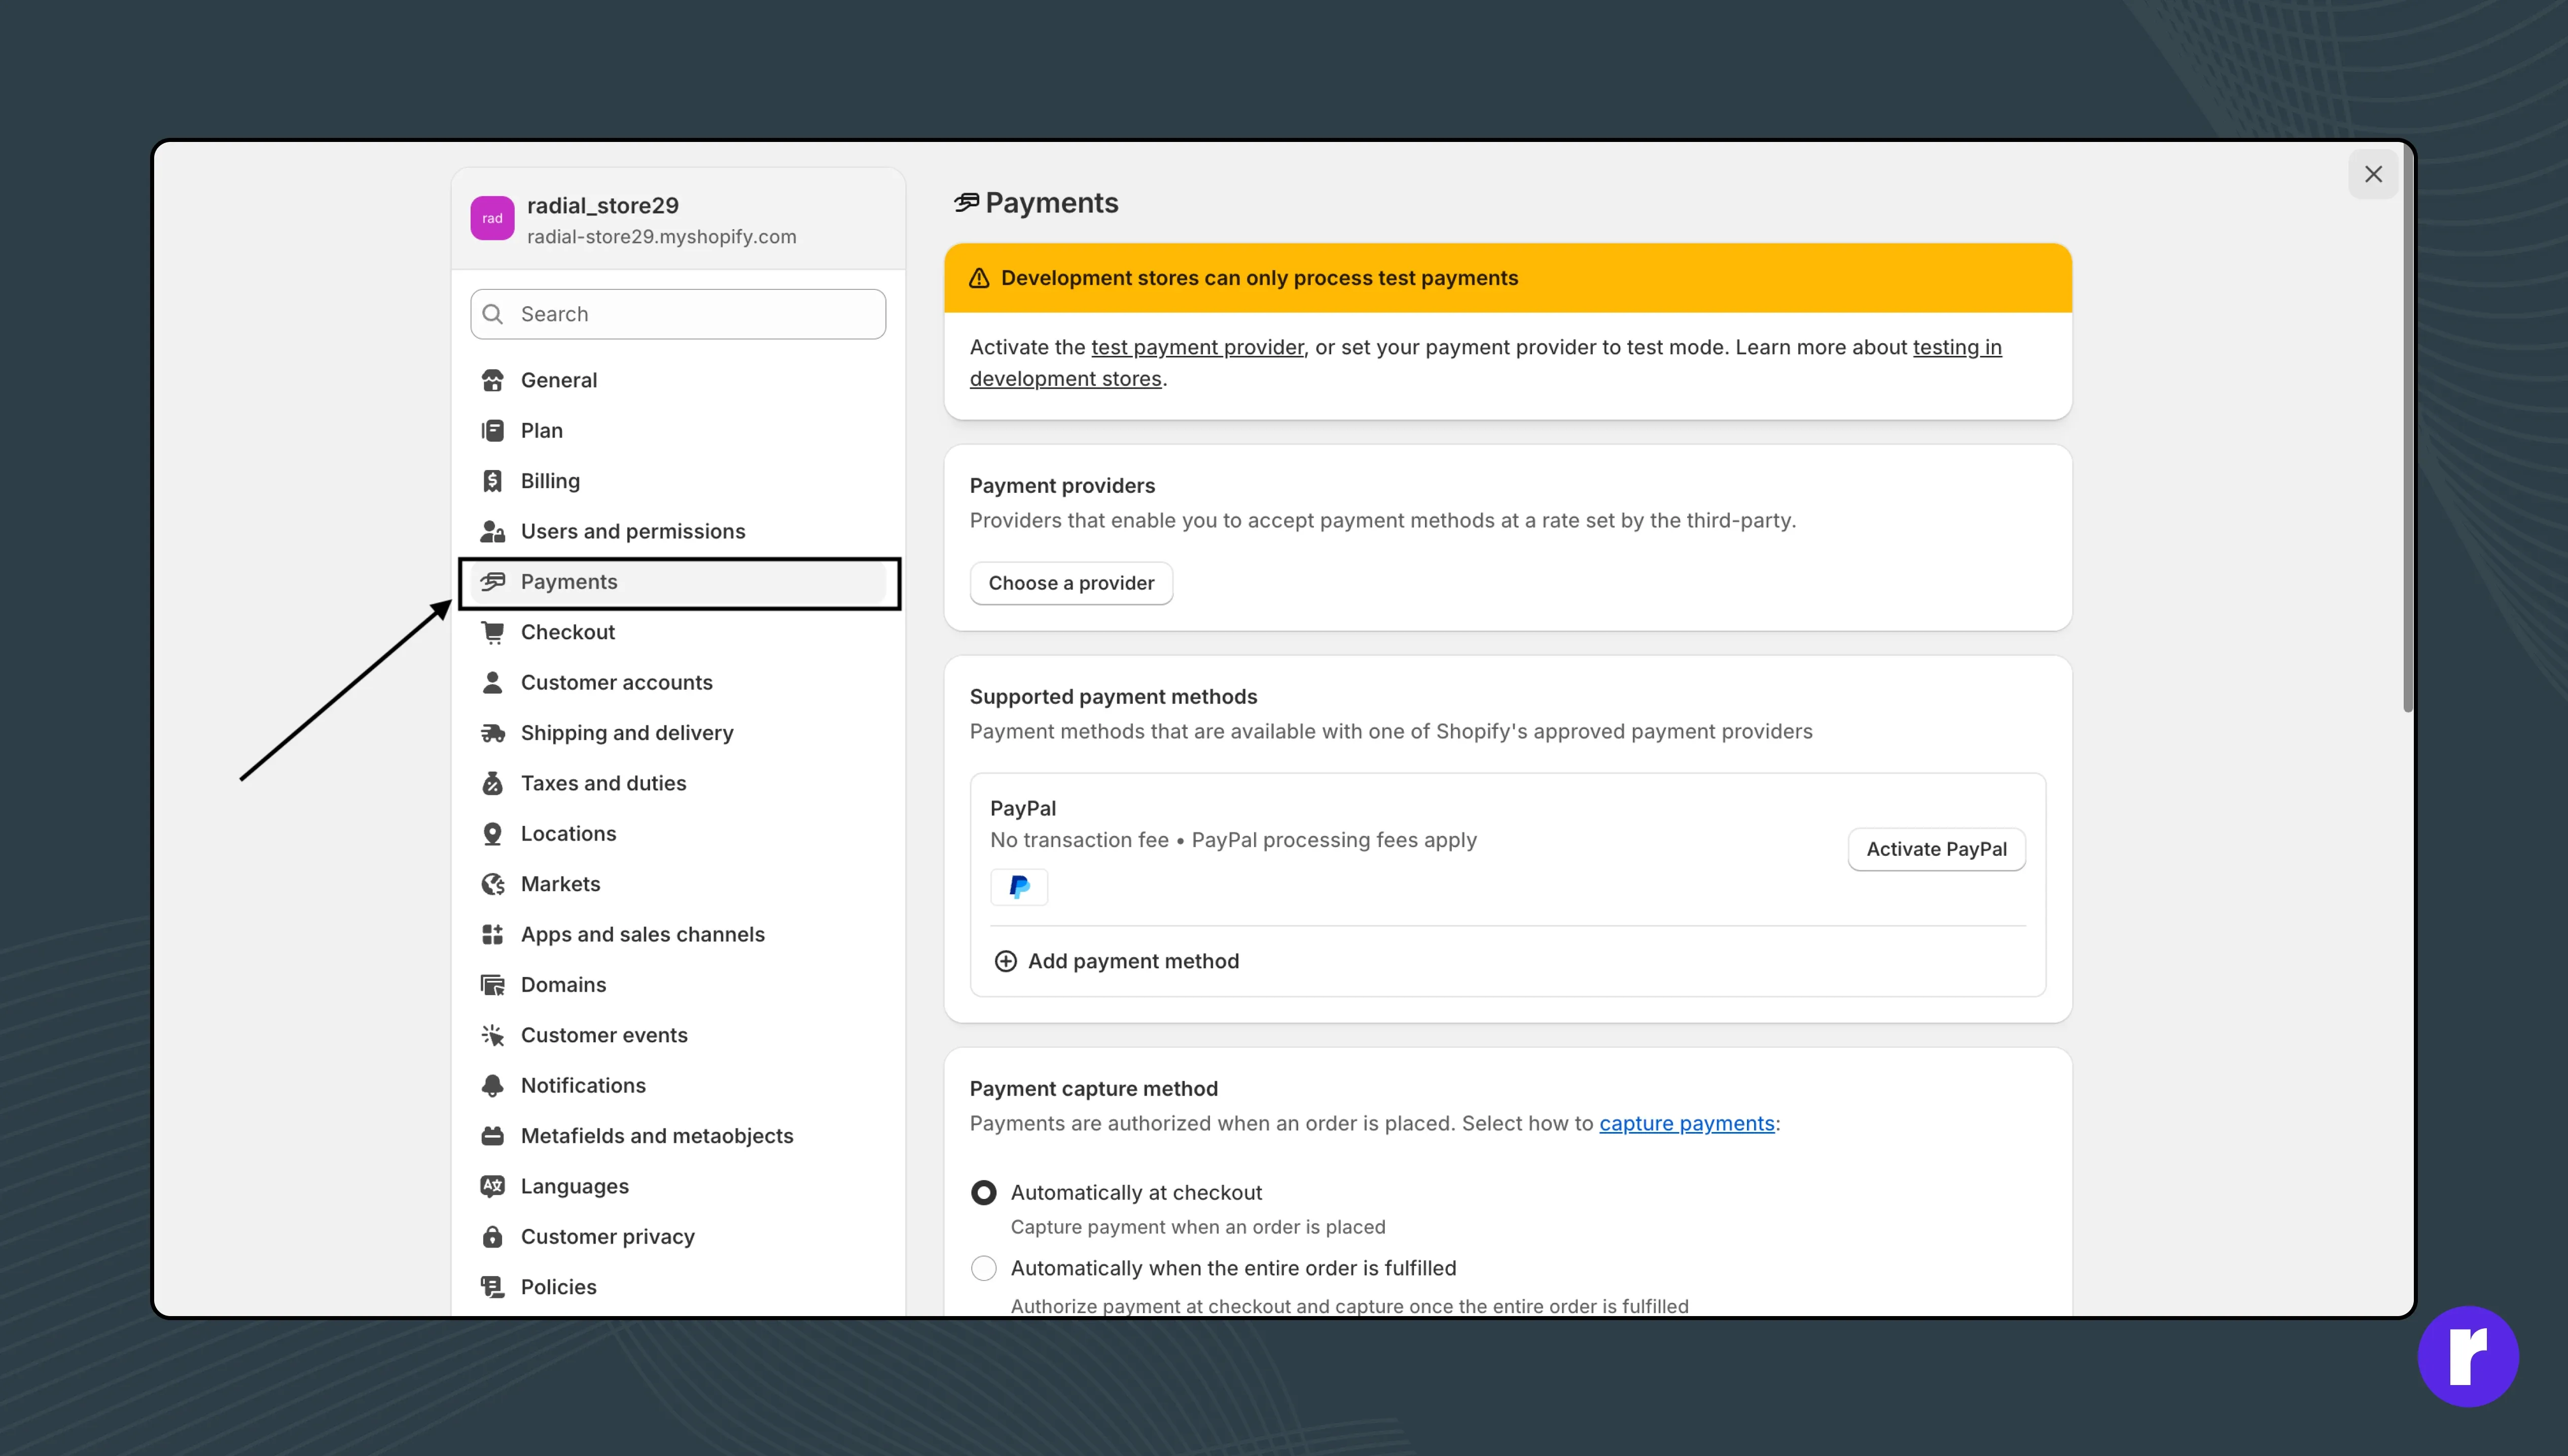
To accept online payments, go to Settings → Payments.
You can enable:
- Shopify Payments (recommended — supports credit/debit cards, UPI, and wallets)
- PayPal
- Manual methods (Cash on Delivery, Bank Transfer, etc.)
Pro Tip: Offering multiple payment options increases conversion rates.
Step 6: Configure Shipping Settings
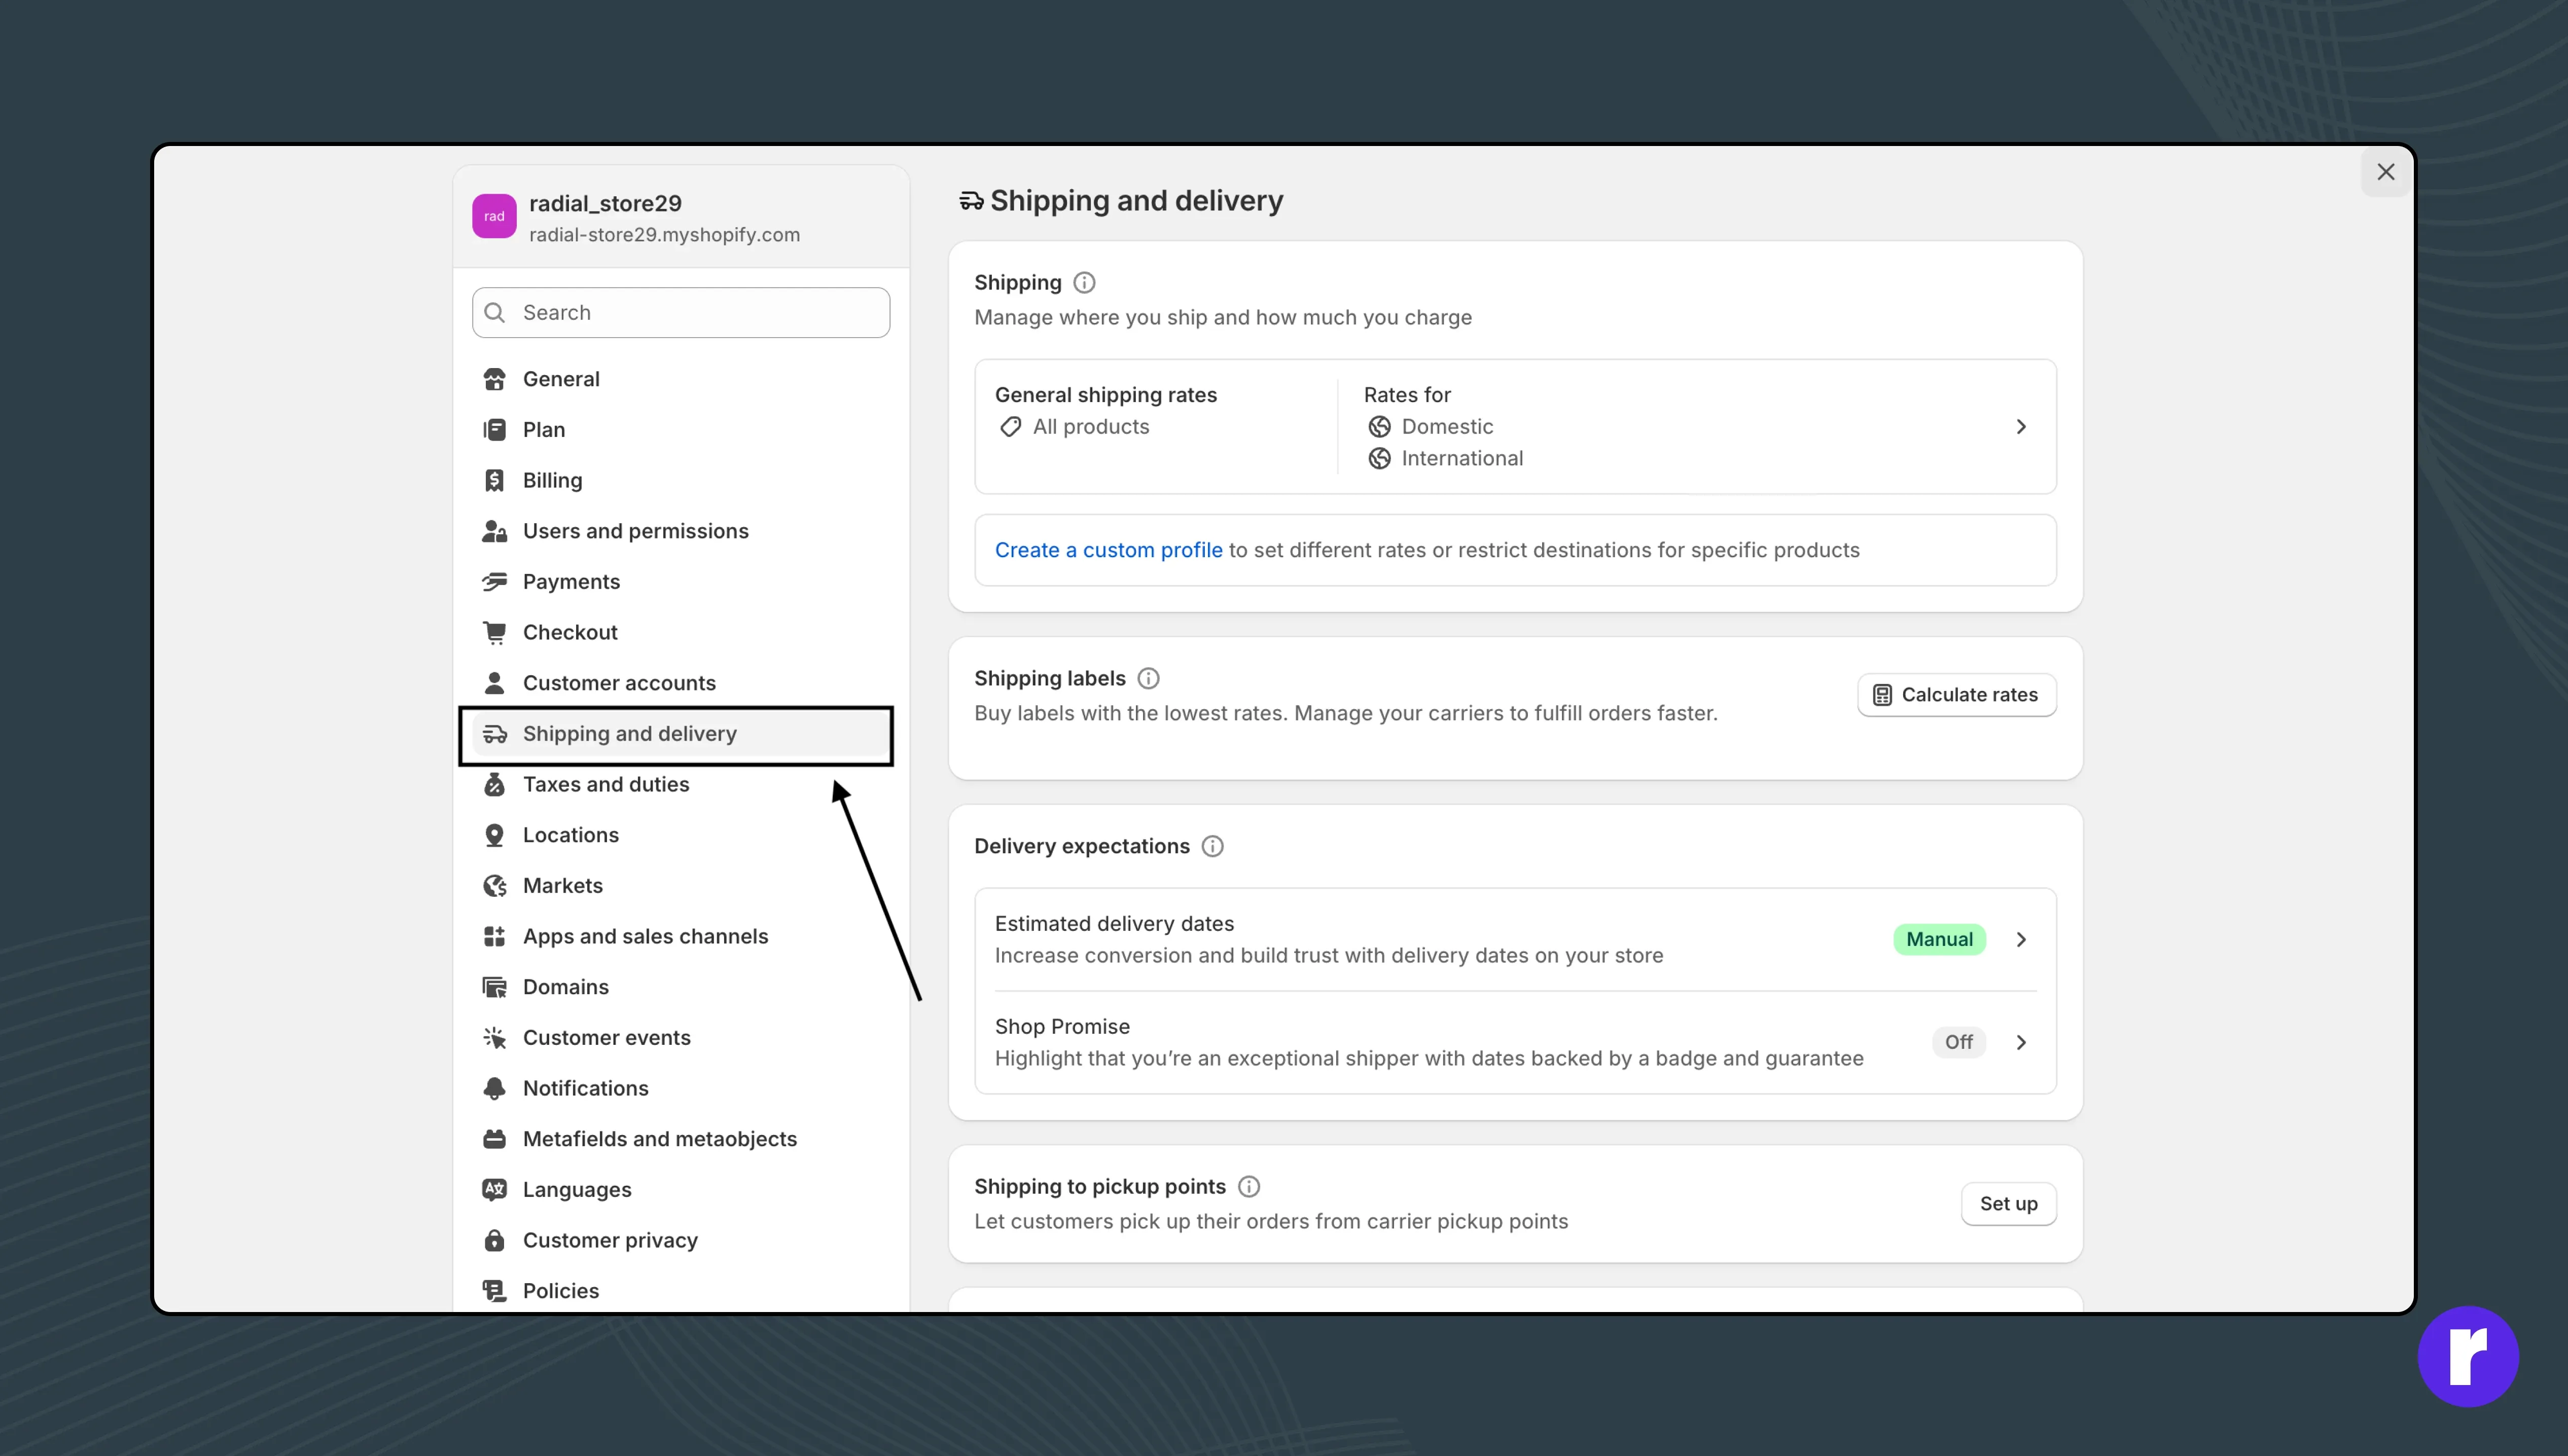
Go to Settings → Shipping and Delivery to:
- Set domestic and international shipping rates
- Define free shipping thresholds
- Connect to third-party couriers if needed
Example: Offer free shipping for orders above ₹999 to encourage larger purchases.
"Turn your business idea into a live Shopify store with Radial code's expert guidance."
Step 7: Add a Custom Domain
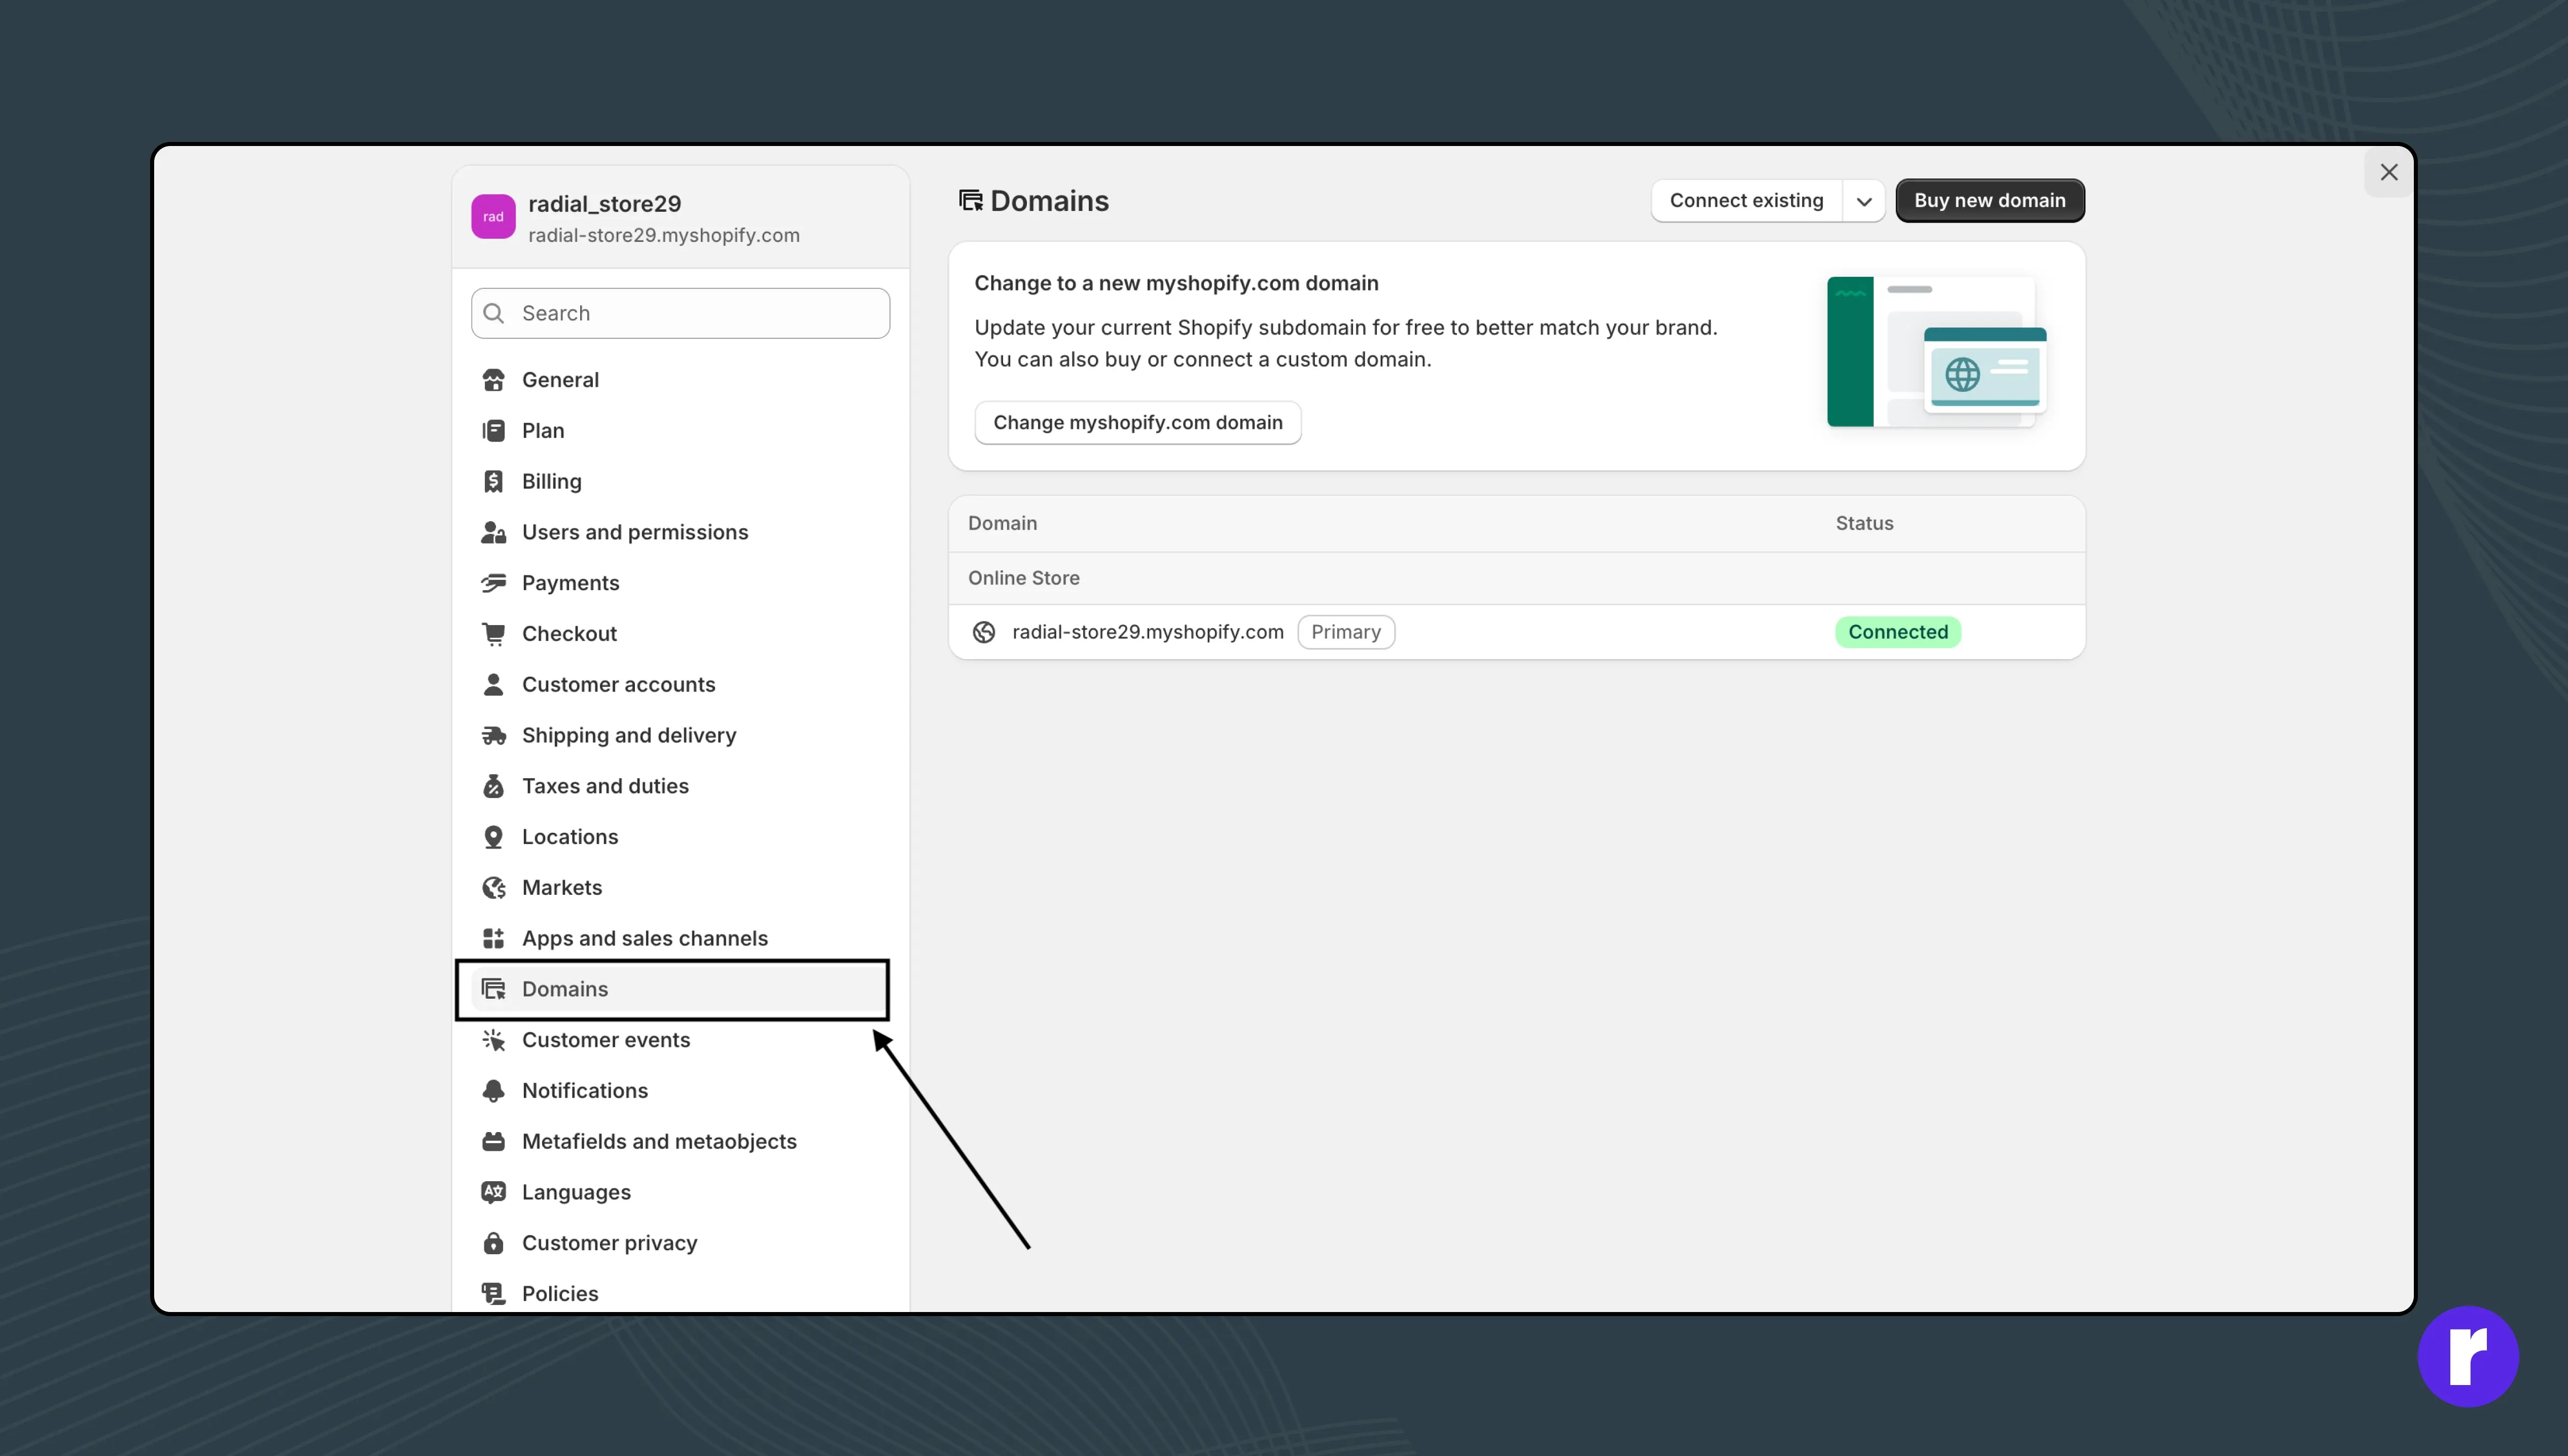
By default, your store’s URL looks like this: yourstorename.myshopify.com
To make it professional, go to Settings → Domains → Buy new domain or connect your existing one (like yourbrand.com).
Pro Tip: Always choose a short, easy-to-type domain name.
Step 8: Customize Store Settings

Visit Settings to fine-tune:
- Store name and address
- Legal pages (Refund, Privacy, Terms of Service)
- Notifications (order confirmations, abandoned cart emails)
- Taxes and currencies
Step 9: Preview and Launch Your Store
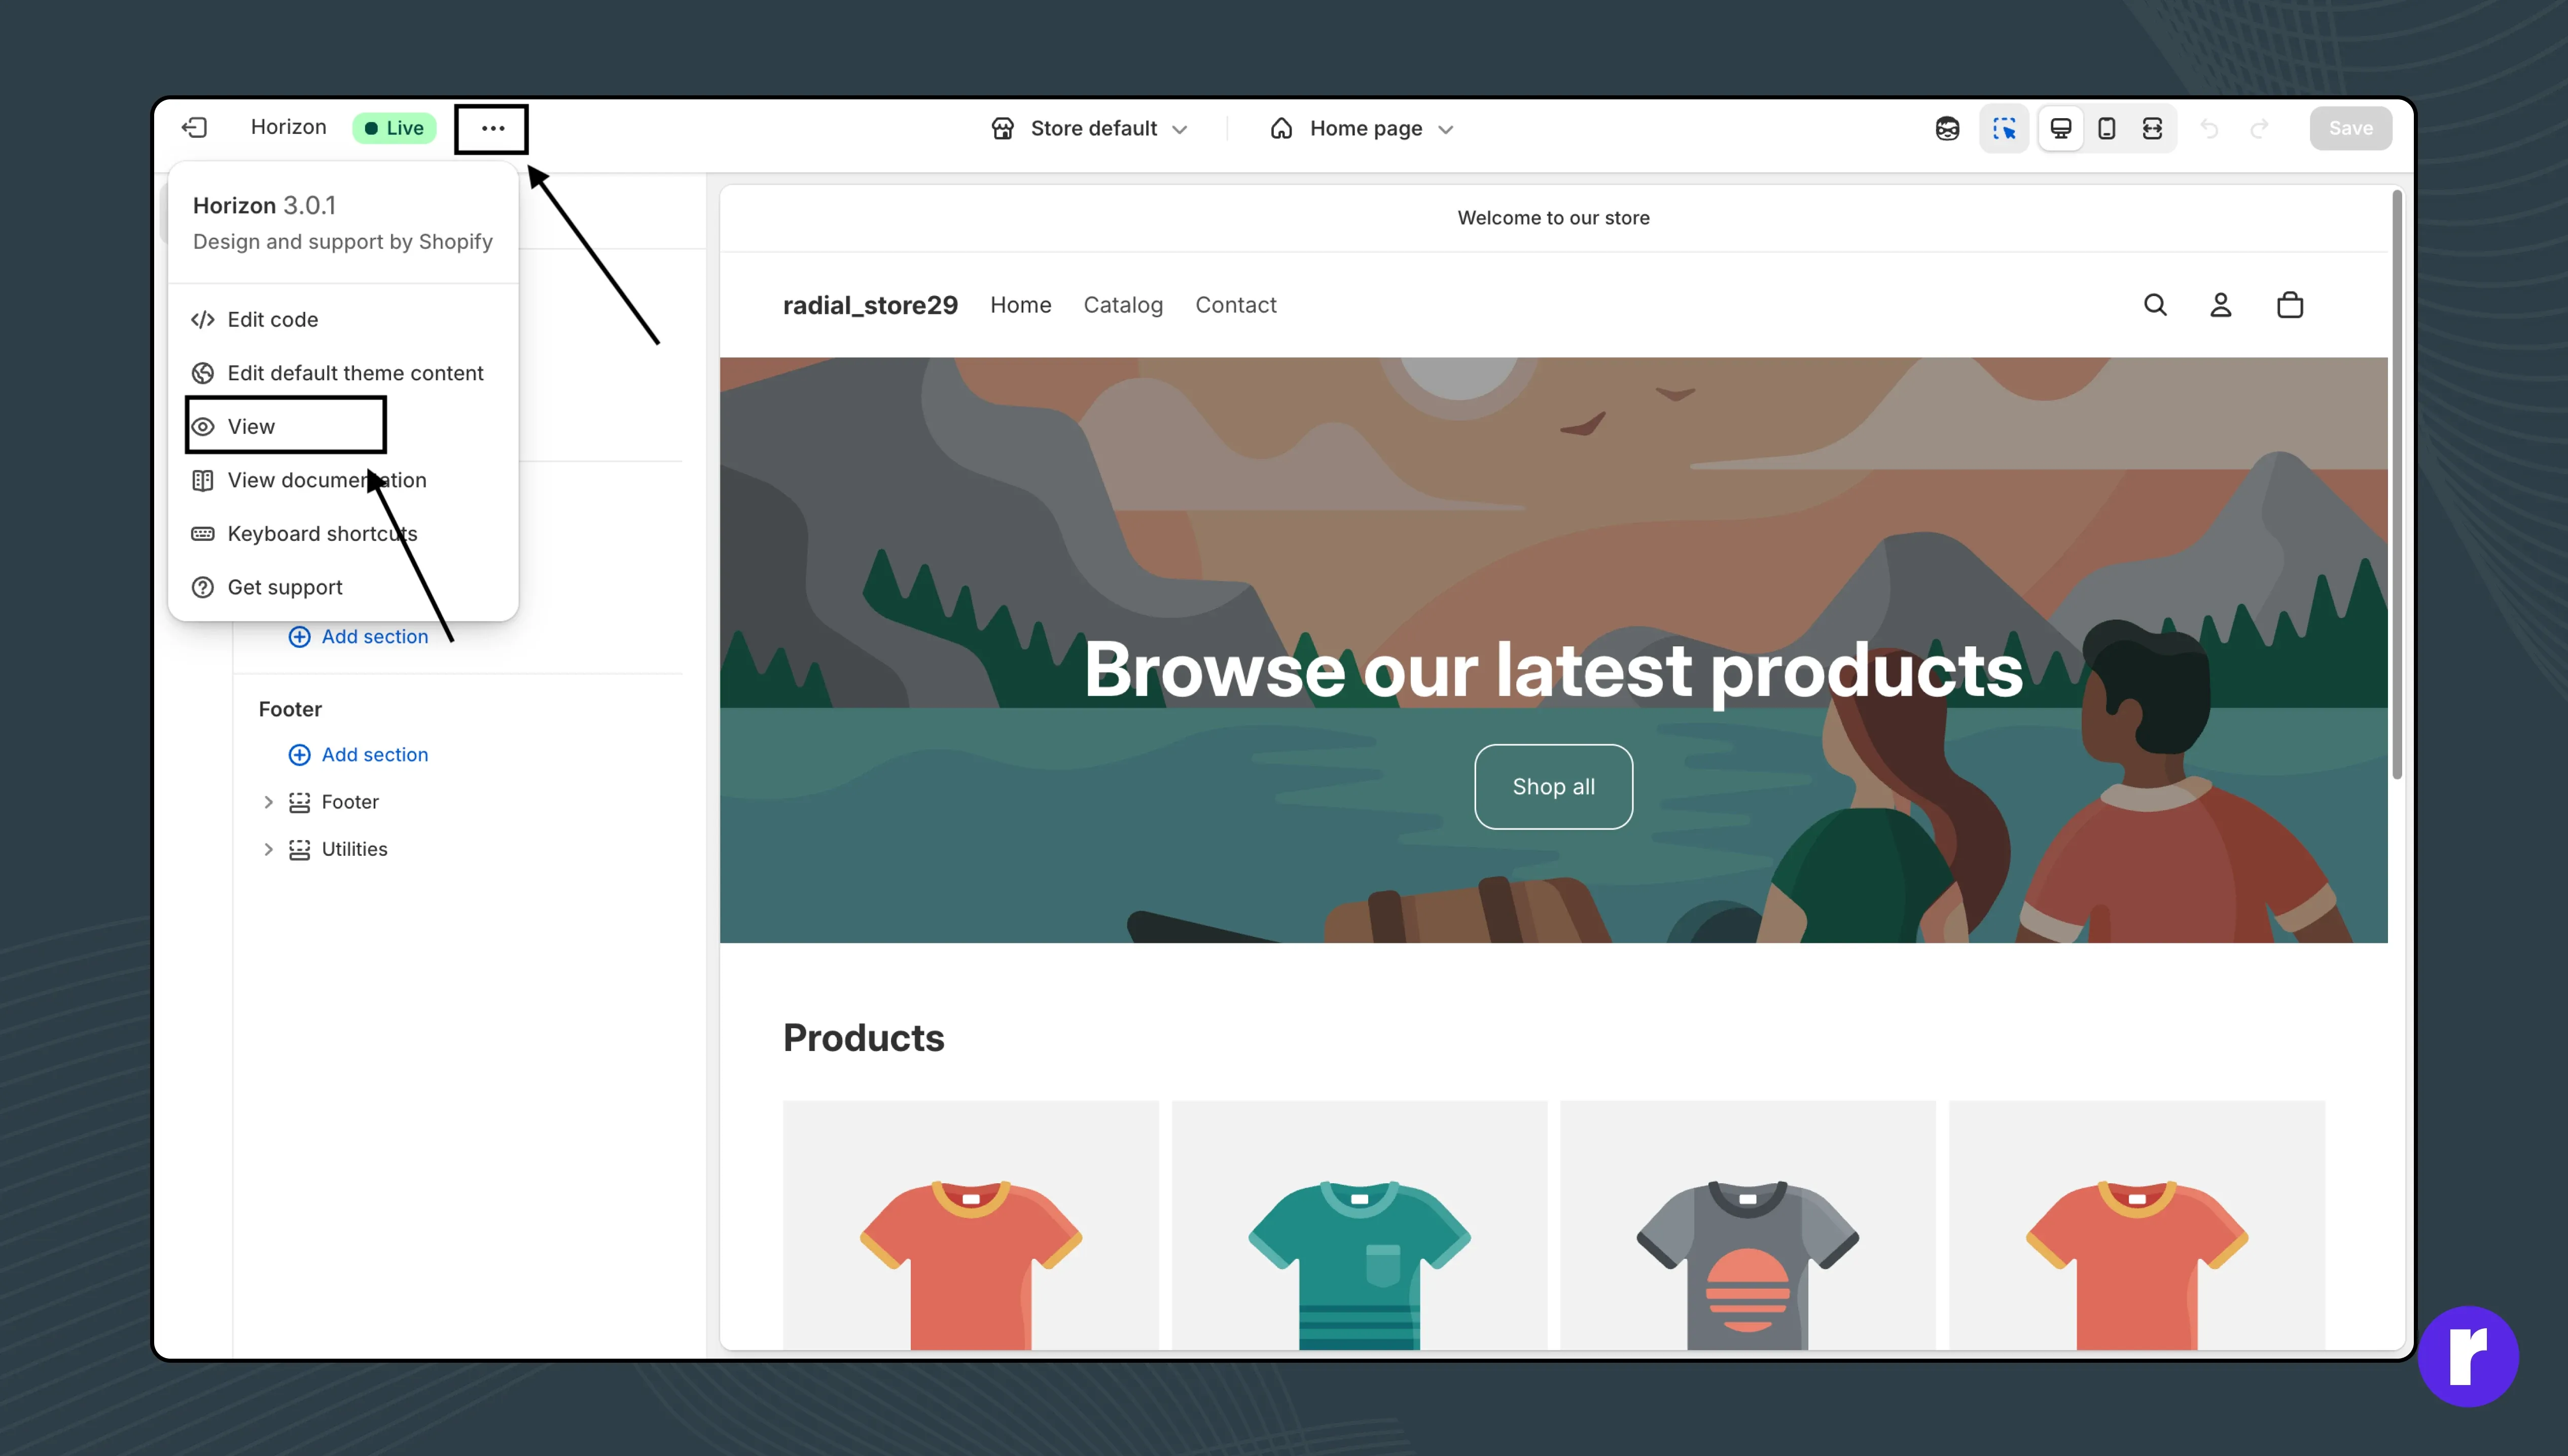
Before going live:
- Test checkout flow
- Review product pages
- Check mobile responsiveness
- Proofread all text
Once ready, disable password protection under Online Store → Preferences and your store is officially LIVE!
Step 10: Market Your Store

After launch, drive traffic using:
- Social media marketing (Instagram, Facebook, TikTok)
- Email campaigns with Shopify Email
- SEO optimization for product pages
- Paid ads (Meta, Google Shopping)
Pro Tip: Use Shopify Analytics to track visitor behavior and sales performance.
Conclusion:
Setting up your first Shopify store is just the beginning — the real success comes from continuous improvement, great product presentation, and strong customer relationships.
With Shopify’s tools, you can go from idea to online business in just a few hours.
Start today — and turn your passion into profit.